
Go to Settings → About to set up your startup core information.
This section acts as your startup pitch page, which Venturz uses to create a public landing page for your business automatically.
You can enter your startup name, upload a logo, write your tagline, and describe what your business does. This page is shareable and helps you present your startup clearly to potential users, partners, or investors.

Go to your Venturz dashboard, click on Settings, then navigate to the Domain section.
In the domain field, enter your full custom domain (for example, yourstartup.com) and click Connect.

Once you click connect, Venturz will show you a list of DNS records that need to be added. These records allow your domain to correctly point to your Venturz-hosted website.

Go to your domain provider (like GoDaddy, Namecheap, or Cloudflare). In your DNS settings, add the exact records provided by Venturz.
After saving the records, it may take a few minutes for the changes to take effect. click on all set then your domain will be connected, and your website will go live using your custom domain.
You can connect your email domain by entering it in the "Email Domain" field and clicking Connect.

Then, add the required records to your DNS settings. Once that's done, click All Set to finish.

*Note: You can connect unlimited domains. Just remember, each startup workspace needs its own separate domain
Go to Settings → Branding to manually customize the visual theme of your startup. You can set your brand’s primary and secondary colors, and choose the fonts used across your website.
These changes are automatically applied to your entire site, ensuring a consistent and professional look that aligns with your brand identity.

Go to Settings → Team to manage your team members. This section lets you invite new team members by entering their email addresses and sending direct invitations to join your workspace.
You can also create custom email addresses using your connected domain. To do this, scroll to the bottom of the Team section and click "Add more address." Then fill in the required details—such as the team member’s name, sender title, and a custom email address linked to your domain.

To customize how emails appear when sent by a team member:
- Click on the team member's profile box.
- You’ll see editable fields for Sender Name, Sender Address, Reply Name, and Reply Address.

Here’s what each field means:
- Sender Name: This is the name that appears in the "From" field when emails are sent.
- Sender Address: The part of the email before “@venturz.co”. For example, if you enter “support”, your sender address will be support@venturz.co.
- Reply Name: The name shown if someone replies to your message.
- Reply Address: The reply email address (usually the same as the sender address).
You can also remove the member or change their role from this panel:
- Set them as an Admin (full access) or keep them as a Member (limited access).
After making changes, click Save to apply.
The Assistant User appears by default in every team list. This is used internally by the AI Assistant to help with tasks like writing, content suggestions, or generating responses. It’s not an actual user and doesn’t require any edits or role changes.
In Settings → Community, you can manage how your community area functions. You can choose whether users are allowed to like or comment on posts. You can also add SEO information to help your community pages appear in search engine results.
Additionally, you can upload a logo or image that will be shown when someone shares your community link. You can also control what notifications you receive—such as comments, replies, reactions, or mentions—and how often you receive them. Notifications can be sent daily, weekly, or not at all, depending on your preference.

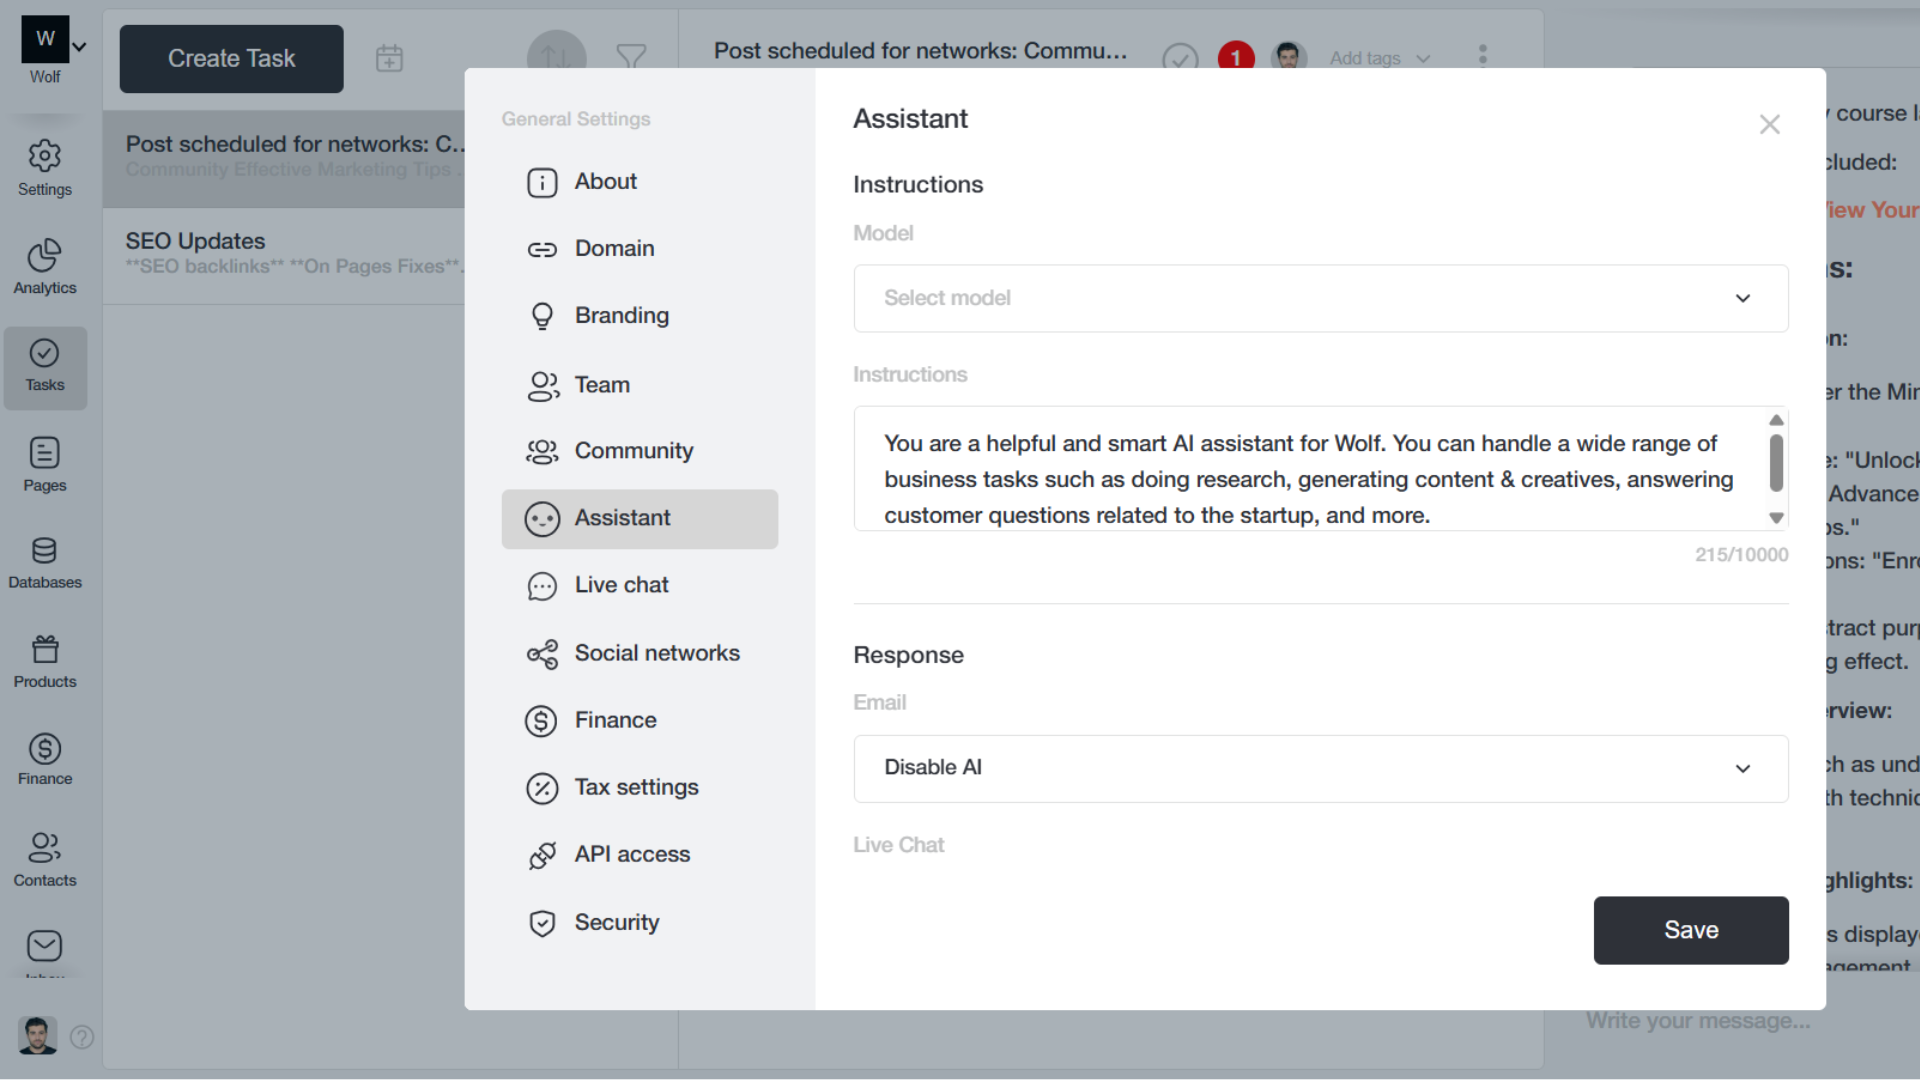
Under Settings → AI Assistant, you can customize how the assistant works across your workspace. You can update its instructions to align with your business tone or communication style. Choose your preferred AI model (gpt-4.1 , gpt-4.1-mini , gpt-5-mini , gpt-5-nano , gpt-5.1 , gpt-5.4 , claude-haiku-4-5 , claude-sonnet-4-6 , claude-opus-4-5 , grok-4 , Kimi-K2.5 , DeepSeek-V3.2 )
You can even choose whether the AI should automatically reply to live chats and emails or if it should only generate drafts for you to review and send manually. This helps streamline communication while giving you full control.
In Settings → Live Chat, you can enable or disable the live chat feature for your website. When enabled, a chat box will appear at the bottom of your website, allowing visitors to message you directly. This is useful for answering questions, offering support, or converting visitors into leads.

You can also control the live chat setting per page.
Here’s how:
- Go to Pages and open any page you want to edit.
- Click the three-dot menu in the top-right corner and choose Page Settings.
- Scroll down and open Advanced Settings.
- Toggle the Live Chat option on or off based on your preference.
- Click Save to apply the change.
To connect your social media accounts, go to Settings → Social Networks. You can connect platforms like Facebook, LinkedIn, Instagram, and others.
When you click to enable a platform, a login window will appear so you can authenticate the connection. A green icon means the platform is successfully connected, while a grey icon means it hasn’t been authenticated yet. Once connected, you can publish and schedule posts directly from Venturz.
Why am I getting error connecting my Facebook pages?
Sometimes even though all necessary permissions are granted and the user has page admin access, Facebook’s API doesn't return the Page list due to the way the IG and FB accounts are connected via the business integration.
Once the IG and FB connections were reset and re-established, the pages will began appearing correctly in Venturz.

Also in the Social Networks section, you'll find the option to track keywords using the Social Listening tool. You can enter brand names, keywords, or hashtags that you want to monitor across platforms like Twitter, Reddit, blogs, and forums. You can select multiple platforms for broader coverage.
When a keyword is mentioned, you’ll receive email notifications. All collected data is stored in your database, where you can view it later for insights and analysis.

In the Security section, you can protect your site by blocking specific visitors or IP addresses. This is helpful if you experience spam, abuse, or unwanted activity. Blocking is simple and can be updated at any time.

Under Settings → Email Templates, you can view and customize the automatic emails your platform sends. This includes password reset emails, reminders, and onboarding messages etc. You can edit existing templates or create new ones to match your brand voice and communication needs.

If you want to send data into Venturz from other platforms (e.g., Pabbly, Payhip, Eventbrite, etc.), use the Venturz REST API.
The API allows you to:
- Add contacts or leads from external tools into Venturz
- Create CRM records directly from your own app
- Sync signups from third-party forms
- Trigger automations or campaigns from external activity
- Feed data into your dashboards or customer profiles

This feature lets you control how your users log in if you're running an external platform outside Venturz.
- URL: This is the login link where you want users to be sent.
- Login Button Text: This is what will appear on the login button (e.g., “Login to Dashboard”).
If you’re integrating Venturz with your own app or SaaS dashboard, this option helps connect the login flow.
1. Trigger Webhook in Your Automation Tool
Start with a webhook trigger to catch the event (e.g. form submission, widget click, Payhip sale, etc.).
2. Use API Action in Your Workflow
After the trigger, add an API module (API Request) to your workflow.
3. Configure API to Venturz
- Method: POST
-
Endpoint URL: https://api.venturz.co/v1/startups/{yourStartupId}/customers
(replace {yourStartupId} with the actual ID found under Settings > API in your Venturz workspace) -
Authentication: Choose "No Auth" but add a header with "Key: Authorization" and "Value: Bearer YOUR_API_SECRET_KEY" (get it from Settings > API)
4. Body / Payload Format
Use raw JSON and format it like this: {"email": "user@example.com","firstName": "John","lastName": "Doe"} (you can map fields dynamically from the webhook trigger data)
(you can map fields dynamically from the webhook trigger data)

A webhook is used to send data out of Venturz when a specific action happens—like a form submission, purchase, or signup. It pushes real-time updates from Venturz to your other tools.
Use webhooks when you want to notify or update other platforms automatically. For example:
- Send lead info to Google Sheets when a user submits a Venturz form
- Notify a Slack channel when someone registers for your event
- Update external tools like Notion or Airtable when a contact completes an automation
- Log CRM activity into a third-party dashboard
- Trigger workflows in tools like Zapier or Make based on events in Venturz.
Note: Webhooks are for pushing data from Venturz to other apps.
How to use it:
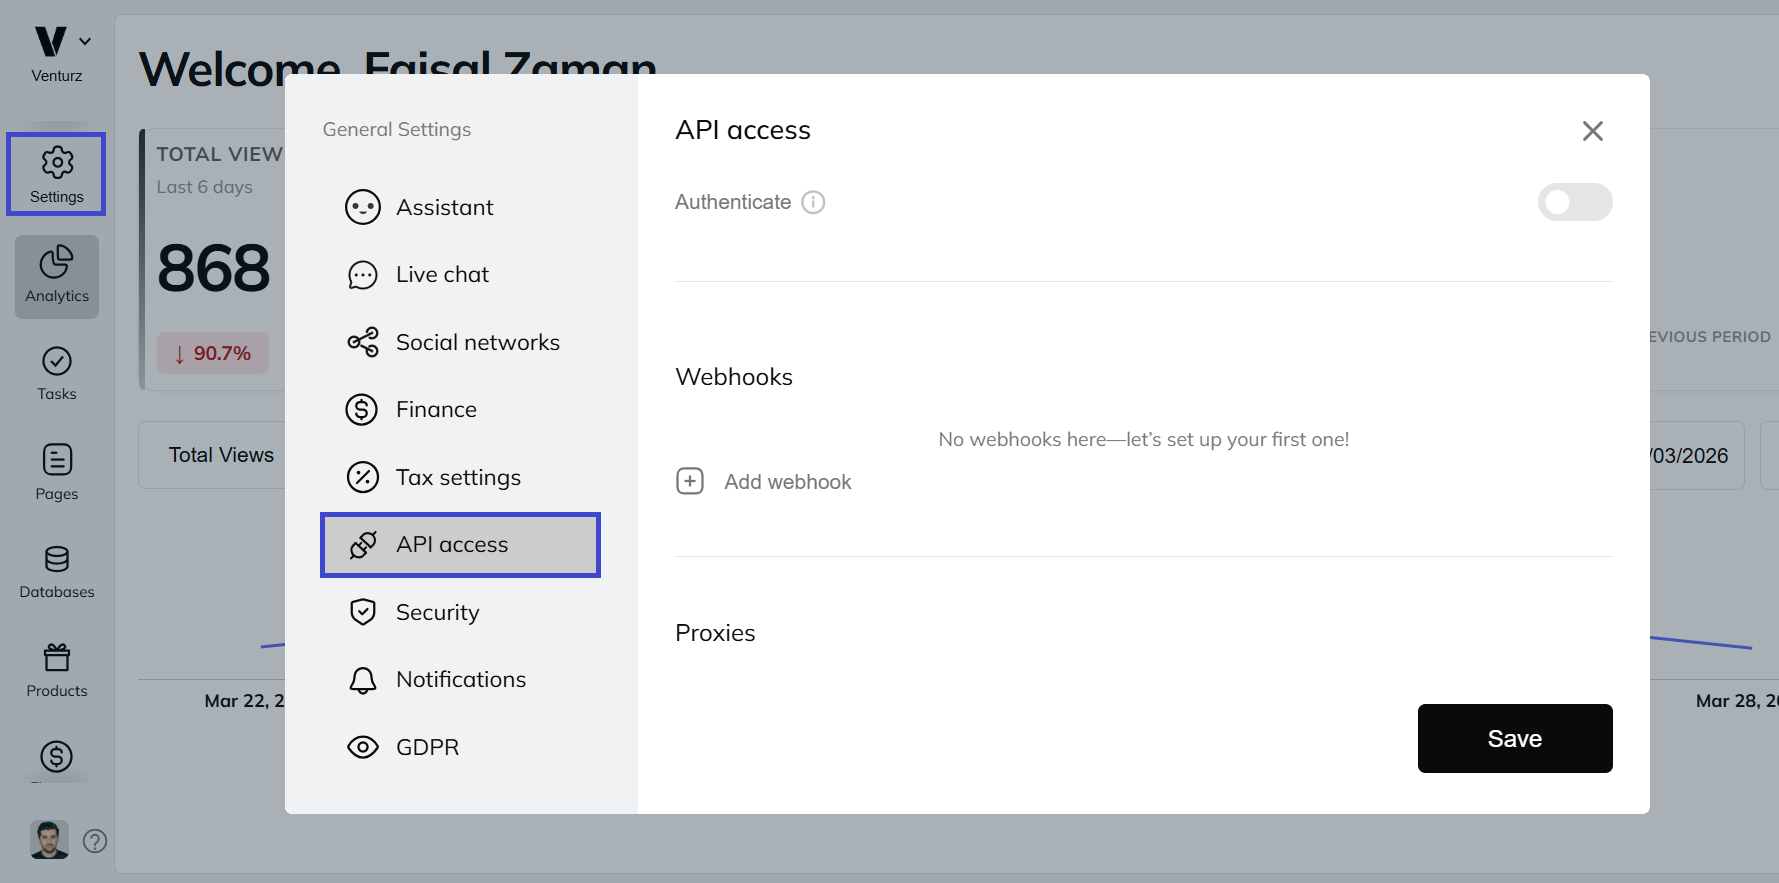
- Go to Settings → API Access
- Scroll to the Webhooks section
- Click “Add Webhook”
- Enter the Webhook URL from your third-party tool (for example, Zapier, Integromat, or your app’s backend)
- Venturz will start sending updates whenever your selected actions occur
This makes it easy to turn external events into internal marketing actions—without needing to manually copy anything.
- CUSTOMER_CREATED
- CUSTOMER_REGISTERED
- PURCHASE_COMPLETED
- INVOICE_PAID
- STRIPE_INVOICE_PAYMENT_FAILED
- USER_PLAN_CREATED
- METRIC_USED
- CUSTOMER_SUBSCRIPTION_DELETED
- METRIC_ALLOWED_LIMIT_REACHED
- PRODUCT_PURCHASED
- SUBSCRIPTION_RENEWED
- SUBSCRIPTION_CANCELLED
- BILLING_CYCLE_RECORD_CREATED
- USER_PLAN_CANCELLED
- USER_PLAN_ENDED
- PURCHASE_REQUEST_RECEIVED

Proxies are usually for developers. They allow API requests to pass through a specific server.
This is only useful if you're routing requests through secure systems or building something custom.
You can click “Add Proxy” if you’ve been given proxy details by your tech team or integration partner.

To securely connect with other tools, Venturz gives you two things:
- Startup ID: A unique code that identifies your startup
- API Access Key: Like a password for integrations—it verifies that your request is safe and allowed
You’ll use these when connecting Venturz with external tools via APIs. Make sure not to share your access key publicly.

You’ll see a link to Venturz’s API docs:
If your developer wants to read/write data to/from Venturz (e.g., create users, pull form submissions, post new events), this is where they’ll find all the instructions.

If you want to create different keys for different tools (or revoke one), you can:
- Click “Create API Access Key”
- Use the key in your third-party tool
- Revoke keys anytime for security
Each key works like a permission slip to access your Venturz account from the outside—so only give them to trusted platforms.
The User Observer lets you track what users are doing on your own website. It’s a small script you add to your site that sends data to your Venturz dashboard.
With it, you can:
- See which pages your visitors view
- Monitor how long users stay
- Track specific actions (clicks, video plays, form fills)
This is especially useful when you're running campaigns or want to monitor how leads interact with your landing pages before they convert.
You can use this data to build smarter segments, automate follow-ups, or simply understand your audience better.
Venturz gives you full control over how and when you get notified about important updates from your Community and Inbox. You can decide what you want to be notified about and how often you want to receive those updates.
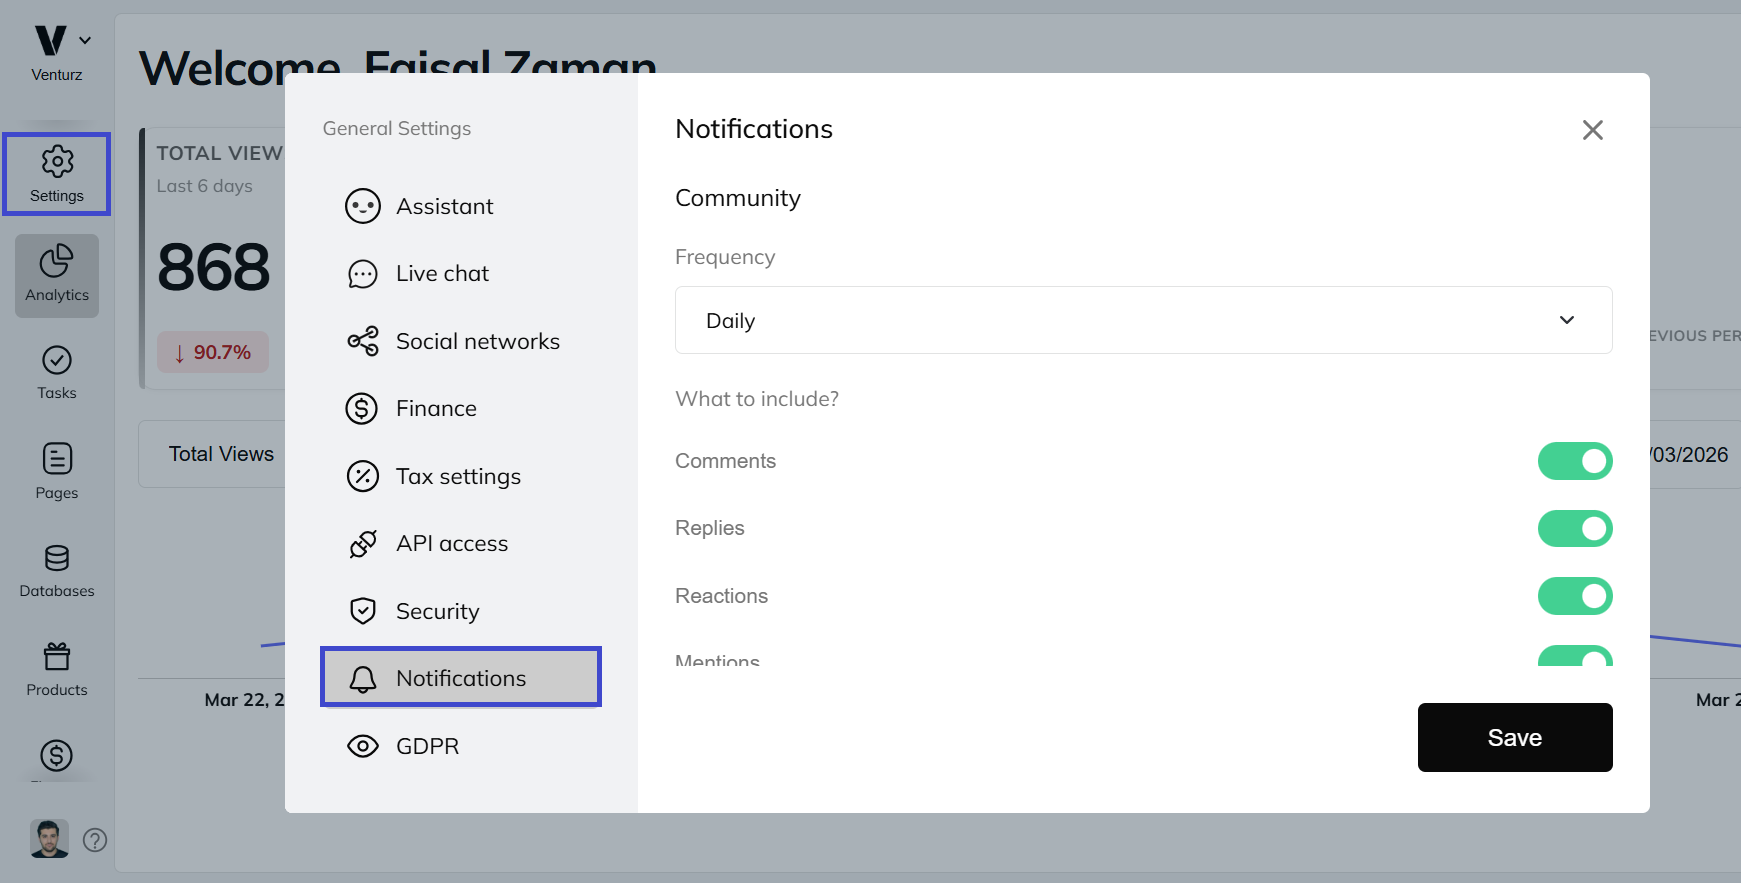
In this section, you can control the alerts you receive about your community activity—like posts, comments, or mentions.
1. Set Frequency
Choose how often you want to get email notifications about community activity:
- Instantly (as soon as something happens)
- Daily (once a day summary)
- Weekly (once a week summary)
- Never (disable all community emails)
2. Choose What to Include:
Toggle ON or OFF the types of community updates you'd like to receive:
- Comments – When someone comments on a post
- Replies – When someone replies to you
- Reactions – When users react (like, love, etc.) to your posts
- Mentions – When someone tags or mentions you in a post
This helps you stay in the loop without being overwhelmed by too many emails.
Below the community section, you’ll find settings for your Inbox notifications. This works the same way—you can:
- Set how often you want updates for new messages
- (Upcoming updates may let you choose types of inbox alerts to include)
This ensures you don't miss important customer messages or new leads.
Navigate to the General Settings > GDPR.
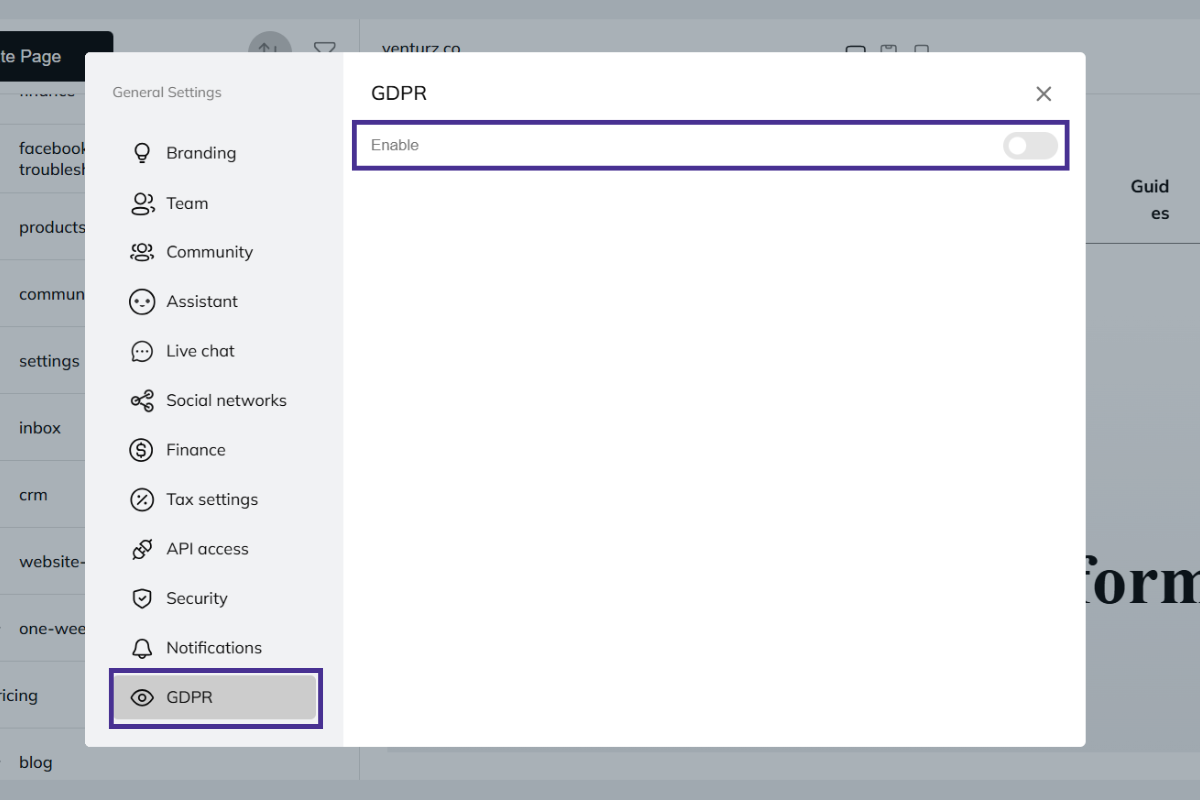
Once GDPR is enabled, you can add modules under different categories like Necessary, Functional, Analytics, Marketing, and Others.
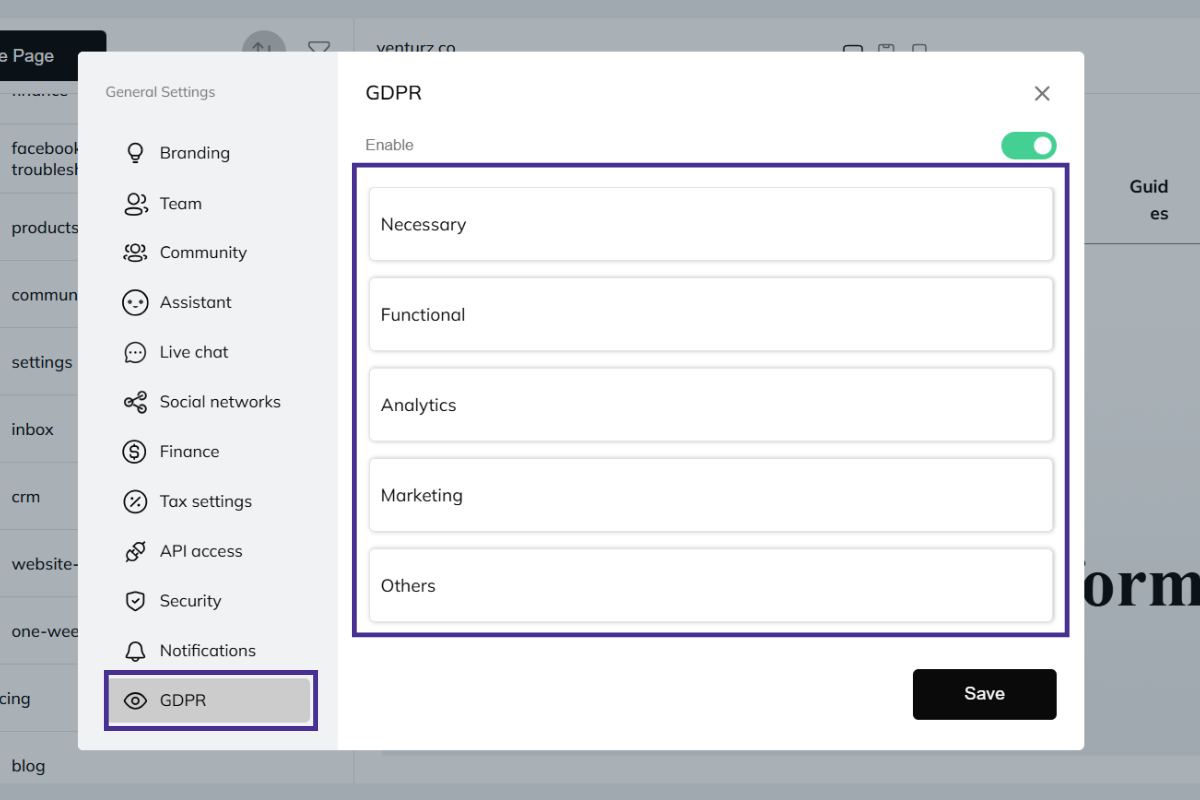
For each module, click Add Module and fill out the following fields:

- Name: Enter the name of the module (e.g., "Google Analytics").
- Description: Provide a brief description of the module's purpose.
- Vendor: Select the vendor or service provider.
- Code: Paste any relevant tracking or compliance code here (e.g., for Google Analytics).
After adding the necessary details for each module, click Save to apply the changes.
Not at all. You can change your venture name, tagline, branding elements, and even SEO titles anytime from the platform.
Feel free to experiment while setting up — you can update everything later once you’re clear on your direction.
- Subdomains (e.g., community.mydomain.com): Fully supported. You can connect them via CNAME in your DNS settings.
- Subdirectories (e.g., mydomain.com/community): Not natively supported, but can be handled via reverse proxy or SSO redirection, depending on your setup.
We had a quick look, and here are the two things to fix:
- Startup ID — In the endpoint URL, make sure you're replacing the {yourStartupId} part without curly brackets. For example, if your startup ID is 123XXXXXXXXabc , your endpoint should be: https://api.venturz.co/v1/startups/123XXXXXXXXabc/customers
- Authorization Header — In the "Authorization" header, you should only enter the actual API key (without any prefix like "Value: BEARER" or the word "Key:").
Once that’s set, use POST method and structure the body as raw JSON. Once set correctly, Venturz will receive the contact and show it in your CRM.
Can't find the solution to your problem and feeling stuck?
No worries at all! We're here to help you out. You can easily reach us in two ways: either by sending an email to support@venturz.co or by clicking on the live chat button located in the right bottom corner of your screen. Don't hesitate to get in touch with any questions you might have!
Startup Events
Live Chat