
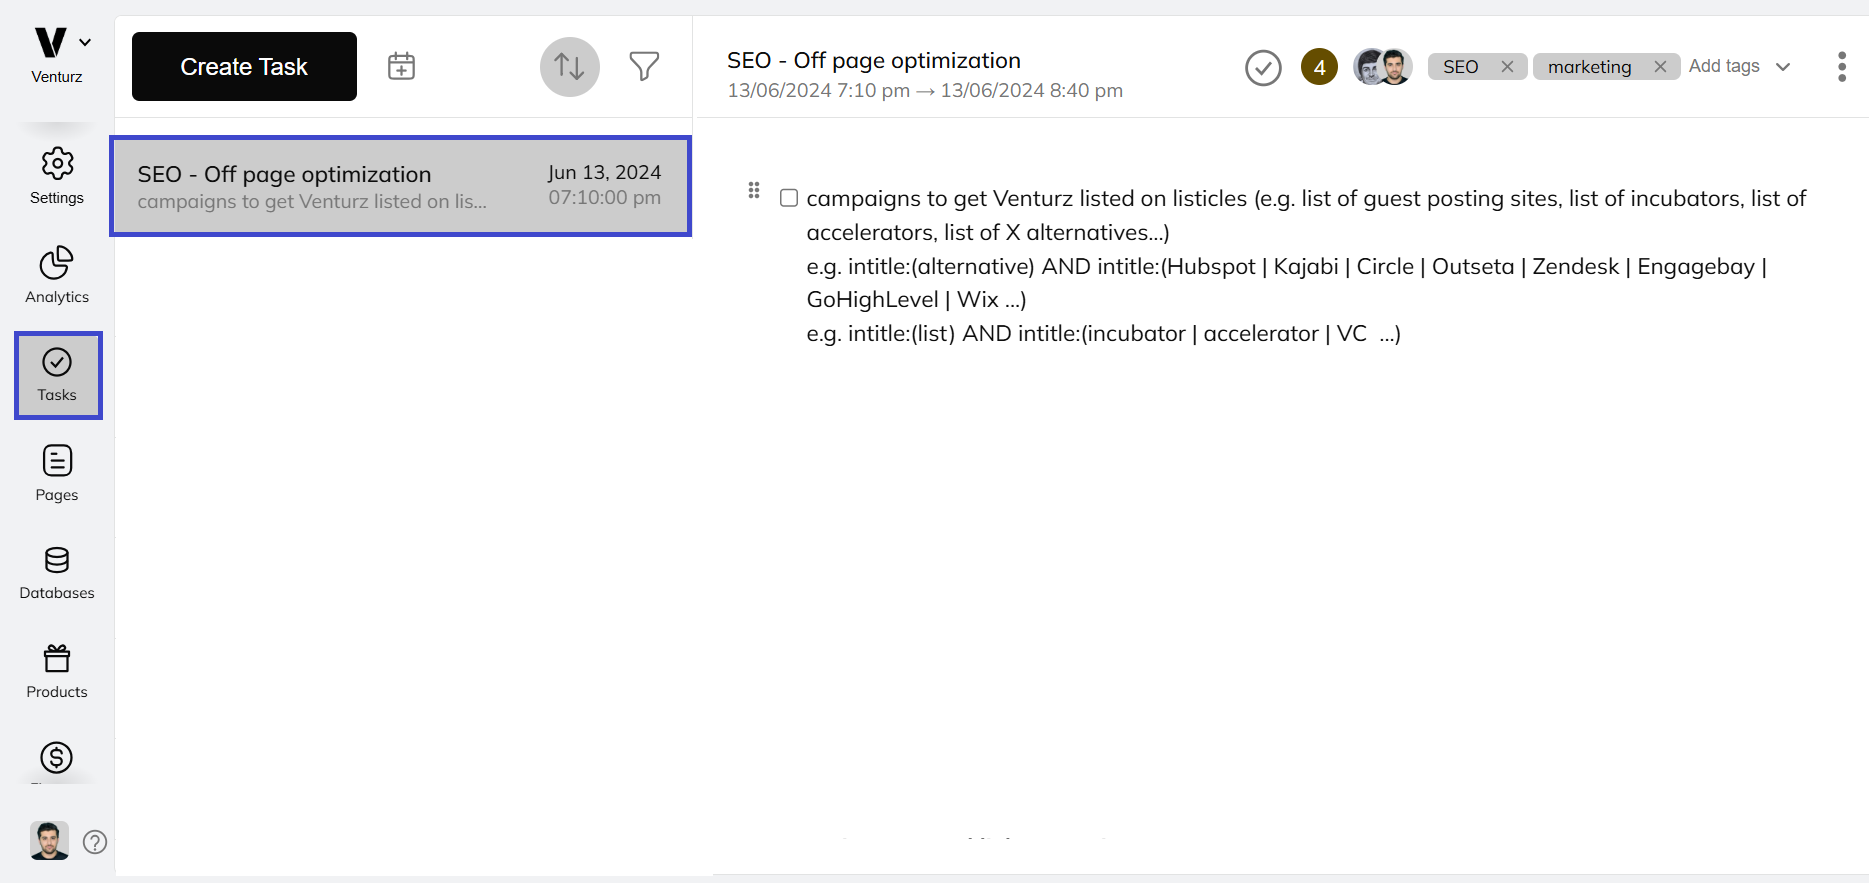
The Task feature in Venturz helps you stay organized by allowing you to create, assign, and manage tasks—all from one place. You can also use it to schedule meetings, set reminders, and keep your team aligned.
To get started, go to your Dashboard and click on Task.
Click on Create Task, and you’ll see two dropdown options—one for creating a task and the other for scheduling a meeting. Choose Create Task to proceed.

Now, enter the name of the task and add the task details. You can use the "/" slash command inside the editor to format text, add bullet points, insert links, or structure the content with blocks—just like editing a page.

Next, you can assign the task to one or more team members. Add tags to help categorize or filter tasks later. Set the start and end time, and choose whether the task should repeat (weekly, monthly, or yearly), depending on its nature. You can also choose to add reminders, so you or your team members get notified before the task is due.

Once the task is created, it will appear on your Task Dashboard, where you can track progress and make edits if needed.
Venturz lets you easily manage your availability and allow users or clients to book meetings directly with you. Follow these steps to set up your calendar and start receiving appointments.
Click on your profile icon in the top-right corner of your dashboard. Select “Availability”.
Toggle the switch to “Open for Appointments.” This will activate your calendar settings.
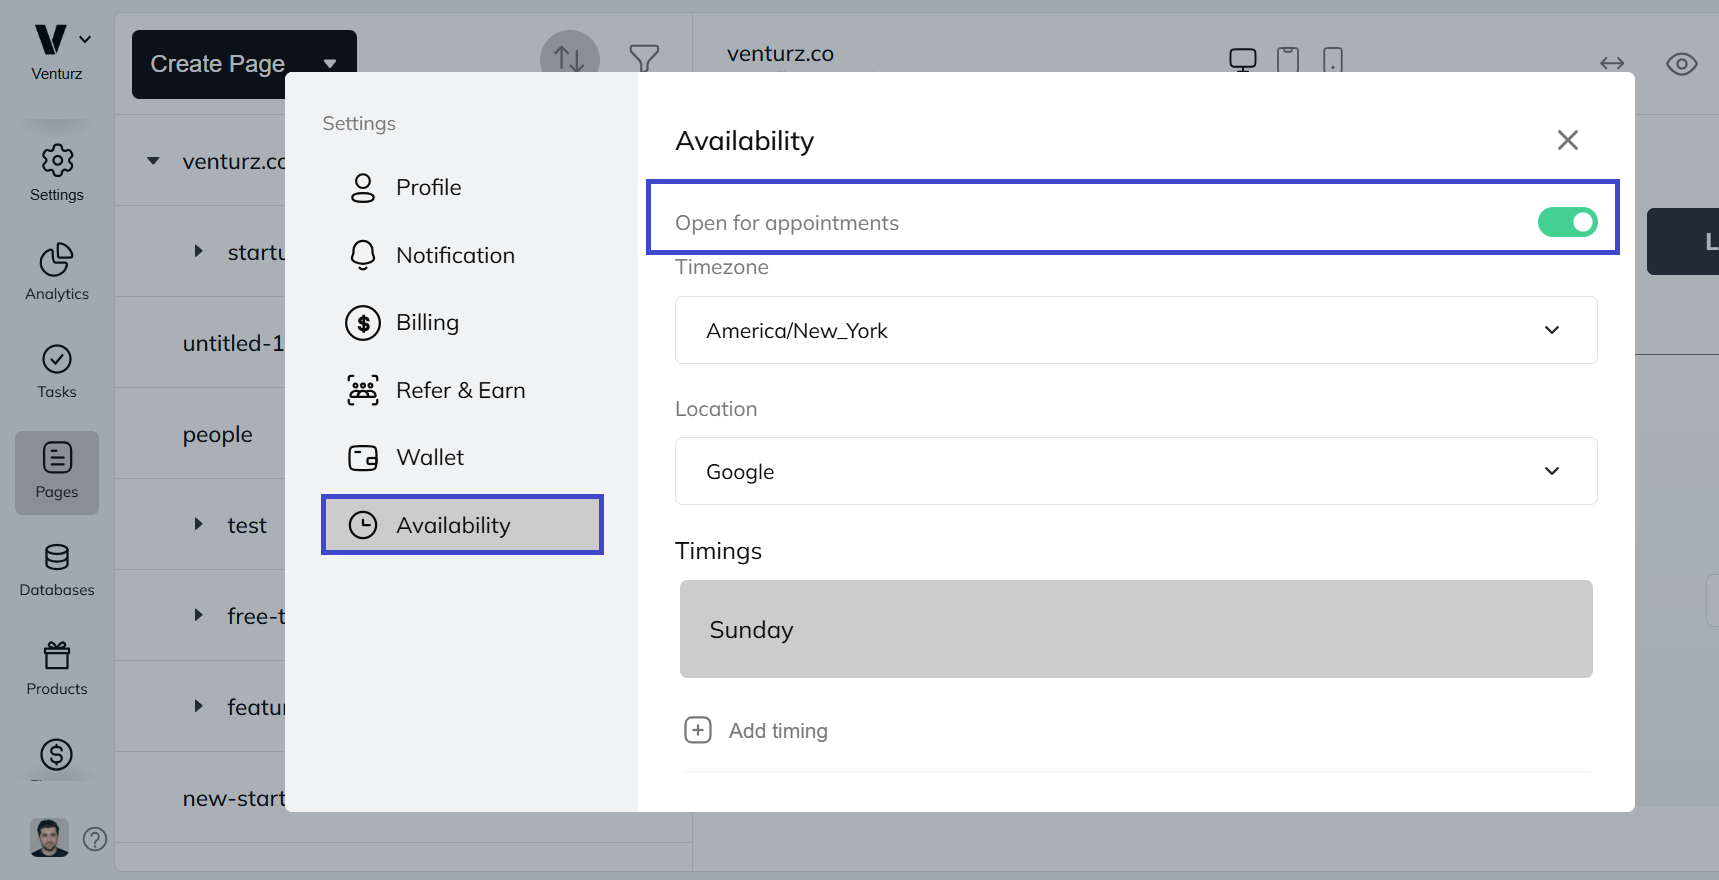

Once appointment mode is enabled, choose your time zone and location from the dropdowns. If your location is not listed, you can manually enter it in the “Other” field.
Now, configure your weekly availability. Click on the day(s) you want to set your available time slots for. For each selected day, enter the time ranges you’re available for appointments. You can adjust this for each weekday based on your schedule.

To make it easy for others to book time with you, create a dedicated appointment page. Go to your website pages and create or edit a page.
Use the “/” command and add the “Member Calendar” block.
If you're part of a team, you can choose which team member’s calendar to display.

Once the Member Calendar block is added, your live page will display a calendar with available time slots. Visitors can view your calendar, pick an available time, and schedule a meeting directly.

All booked meetings will appear in your Tasks section automatically. You can manage or reschedule them from there if needed.
Can't find the solution to your problem and feeling stuck?
No worries at all! We're here to help you out. You can easily reach us in two ways: either by sending an email to support@venturz.co or by clicking on the live chat 💬 button located in the right bottom corner of your screen. Don't hesitate to get in touch with any questions you might have!
Startup Events
Live Chat