
The Community feature in Venturz lets you engage with your audience directly on your platform. You can post updates, share content, start discussions, run polls, host live streams, and more—all in one place. Here's how to set it up and use it effectively.
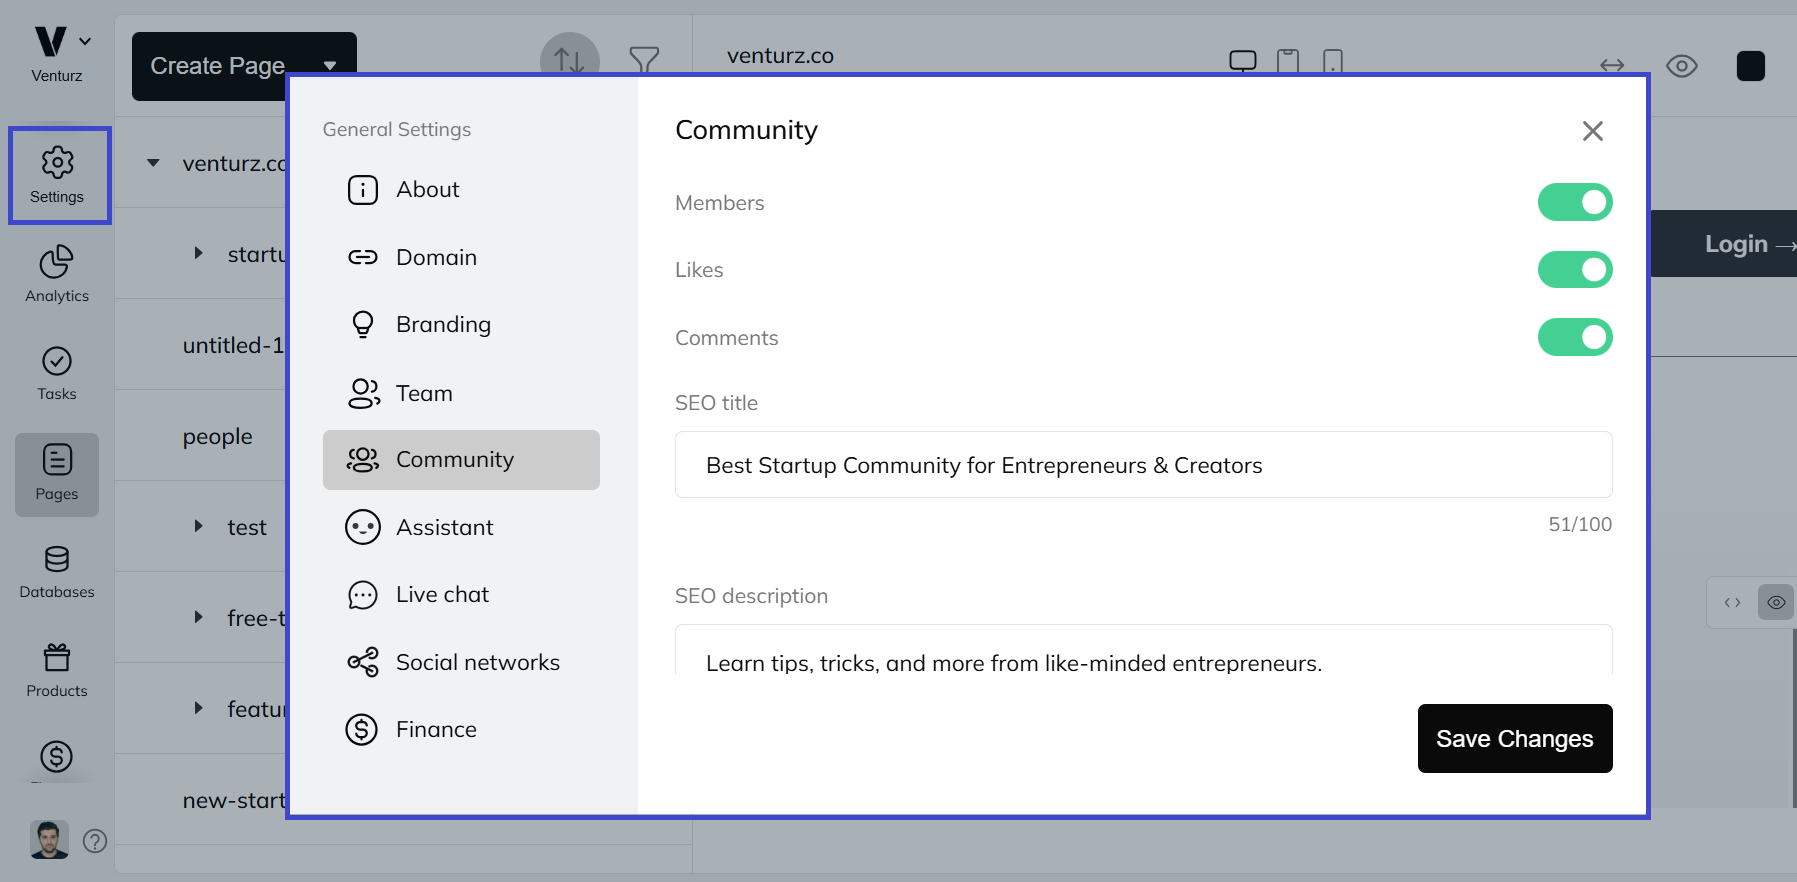
To configure your community settings:
- Go to Settings → Community
Here, you can:
- Enable or disable likes and comments on your posts
- Add SEO details (like title and description) so your community appears in search results
- Upload a logo or cover image—this will appear when your community link is shared on social platforms
This helps you control how your community looks and how users interact with it.
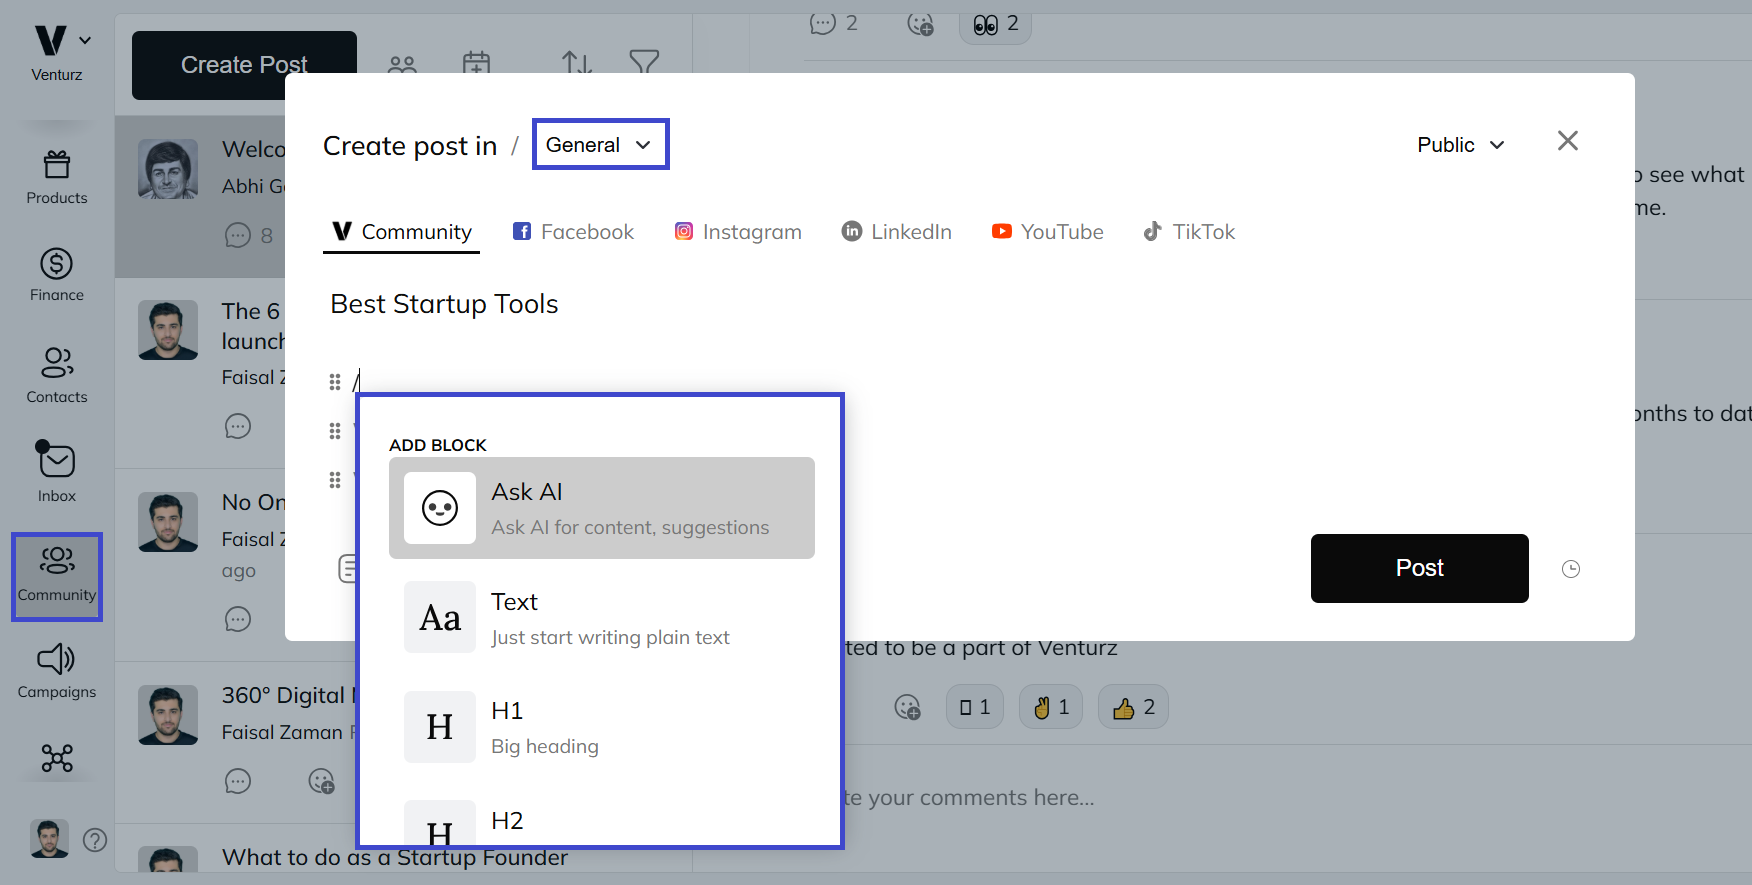
To create a post:
- Go to Community In your dashboard → Create Post
- Start writing directly, or type “/” to add content blocks like text, images, videos, or more
You can also create tags to organize your content—for example: #seo, #socialmedia, #events
Add posts to the relevant tags so your community can browse related content easily.
Venturz allows you to go beyond plain text and add engaging content to your community posts. You can include polls, images or videos, live streams, and even create events—all from the post editor.
Here’s how each feature works:
1. Upload Images or Videos
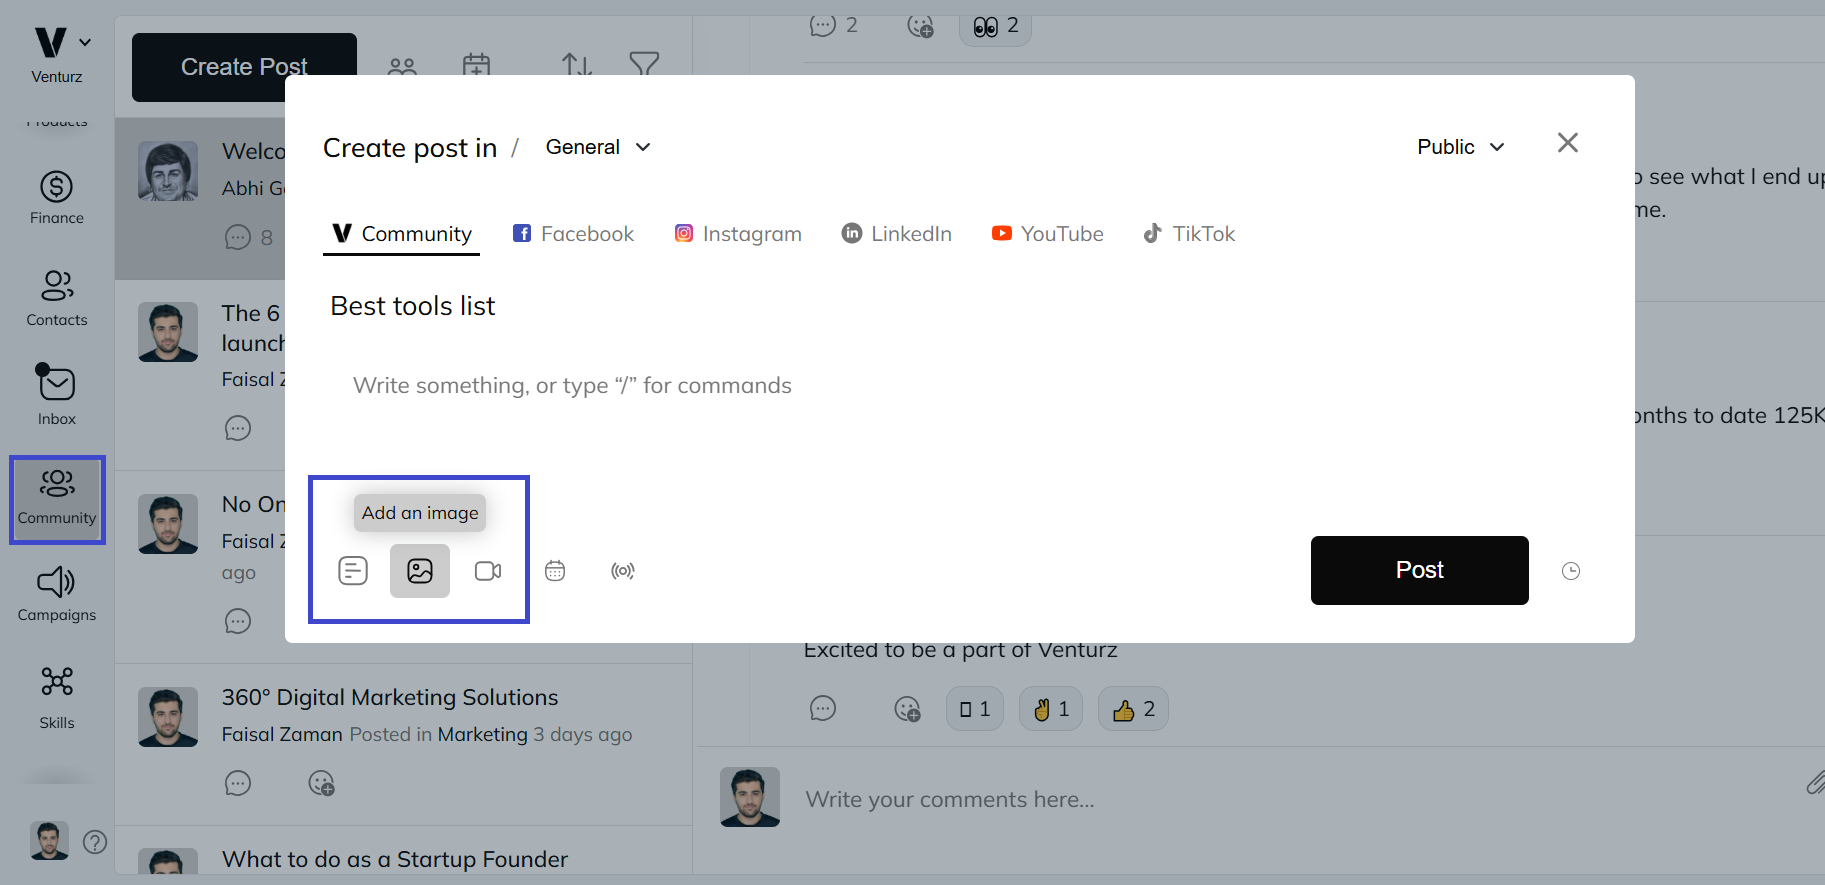
Click on the Add Image or Video icon to include visual content in your post. Simply select a file from your device, and it will be uploaded directly into the post. This is useful when sharing updates, tutorials, or promotional content.
2. Polls
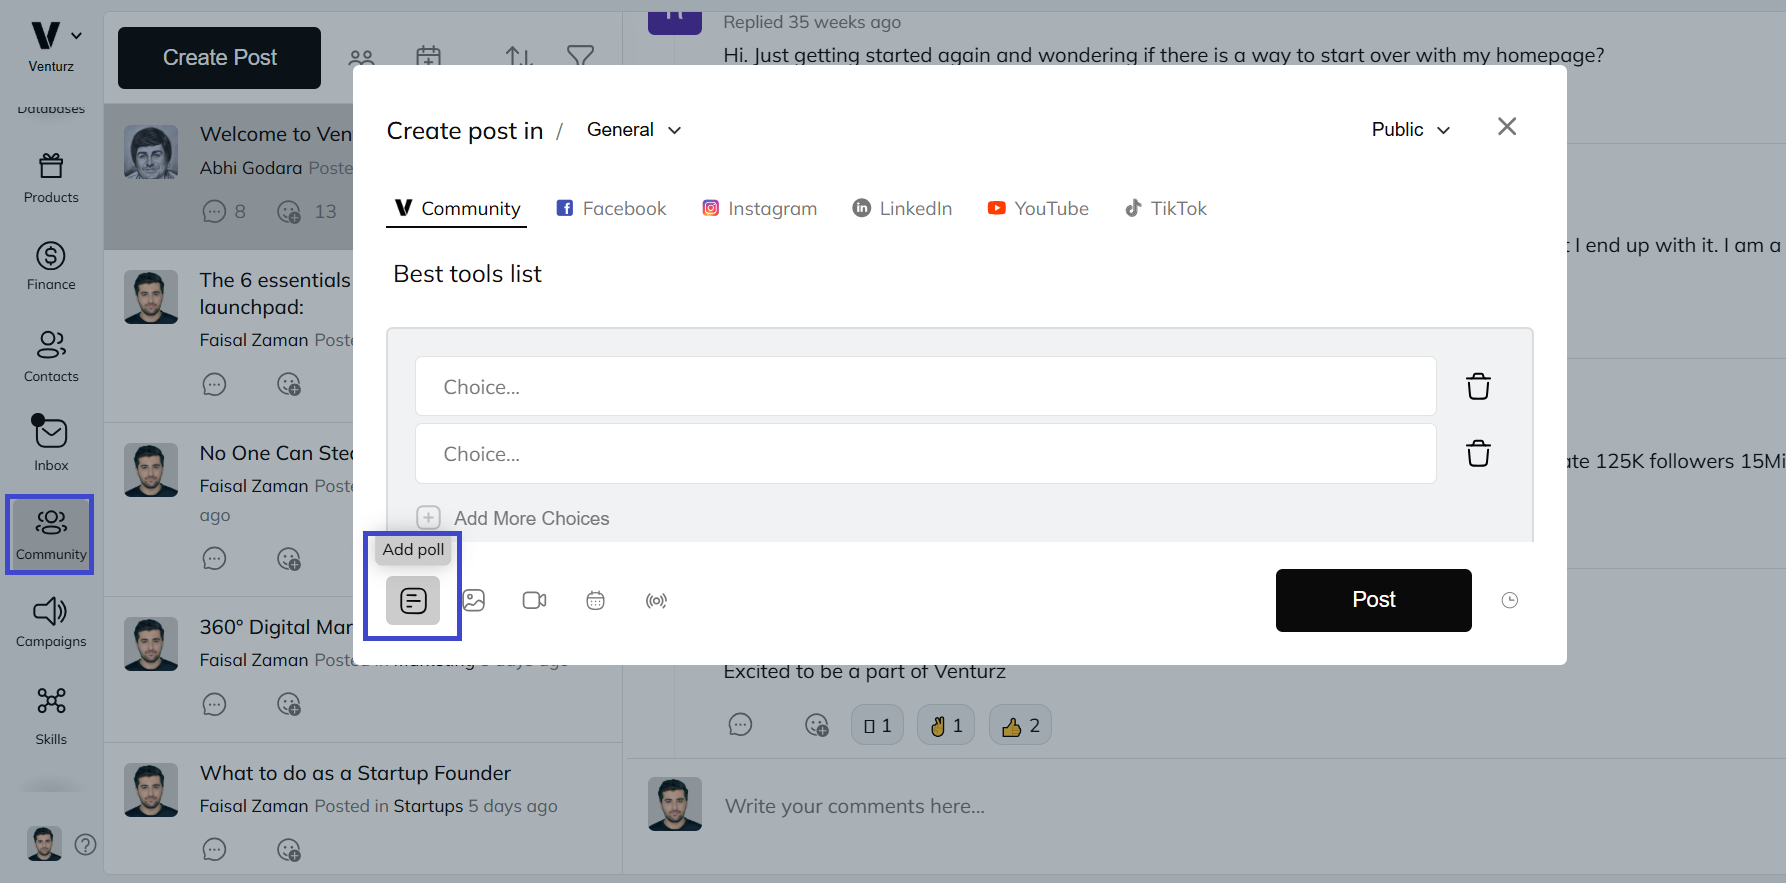
To create a poll, click on the poll icon inside the post editor. You can add your question and list the options you want people to vote on. This is great for collecting feedback or starting discussions with your community.
3. Start a Live Stream
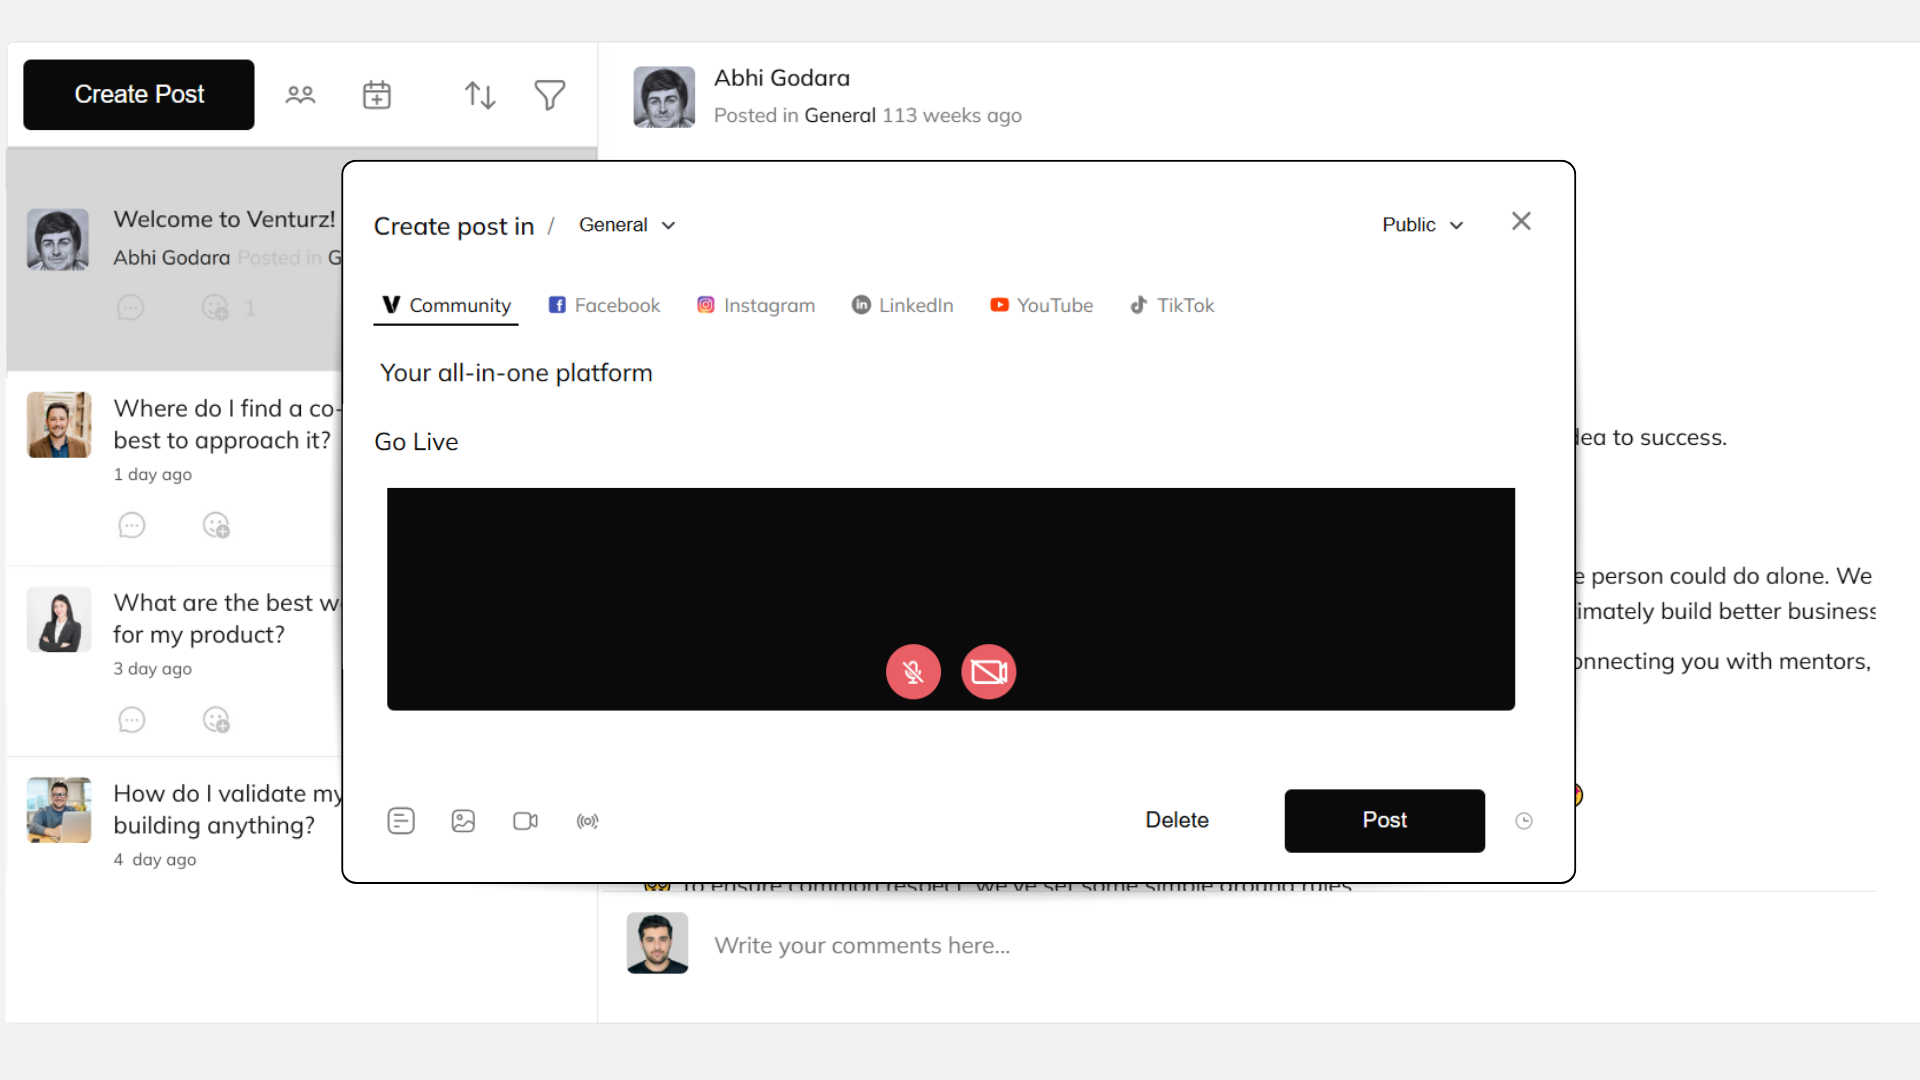
Click on the Go Live icon in the post editor. You can either write a short message before starting or begin the live stream directly. This is ideal for hosting live Q&A sessions, product walkthroughs, or quick updates.
4. Create and Share an Event
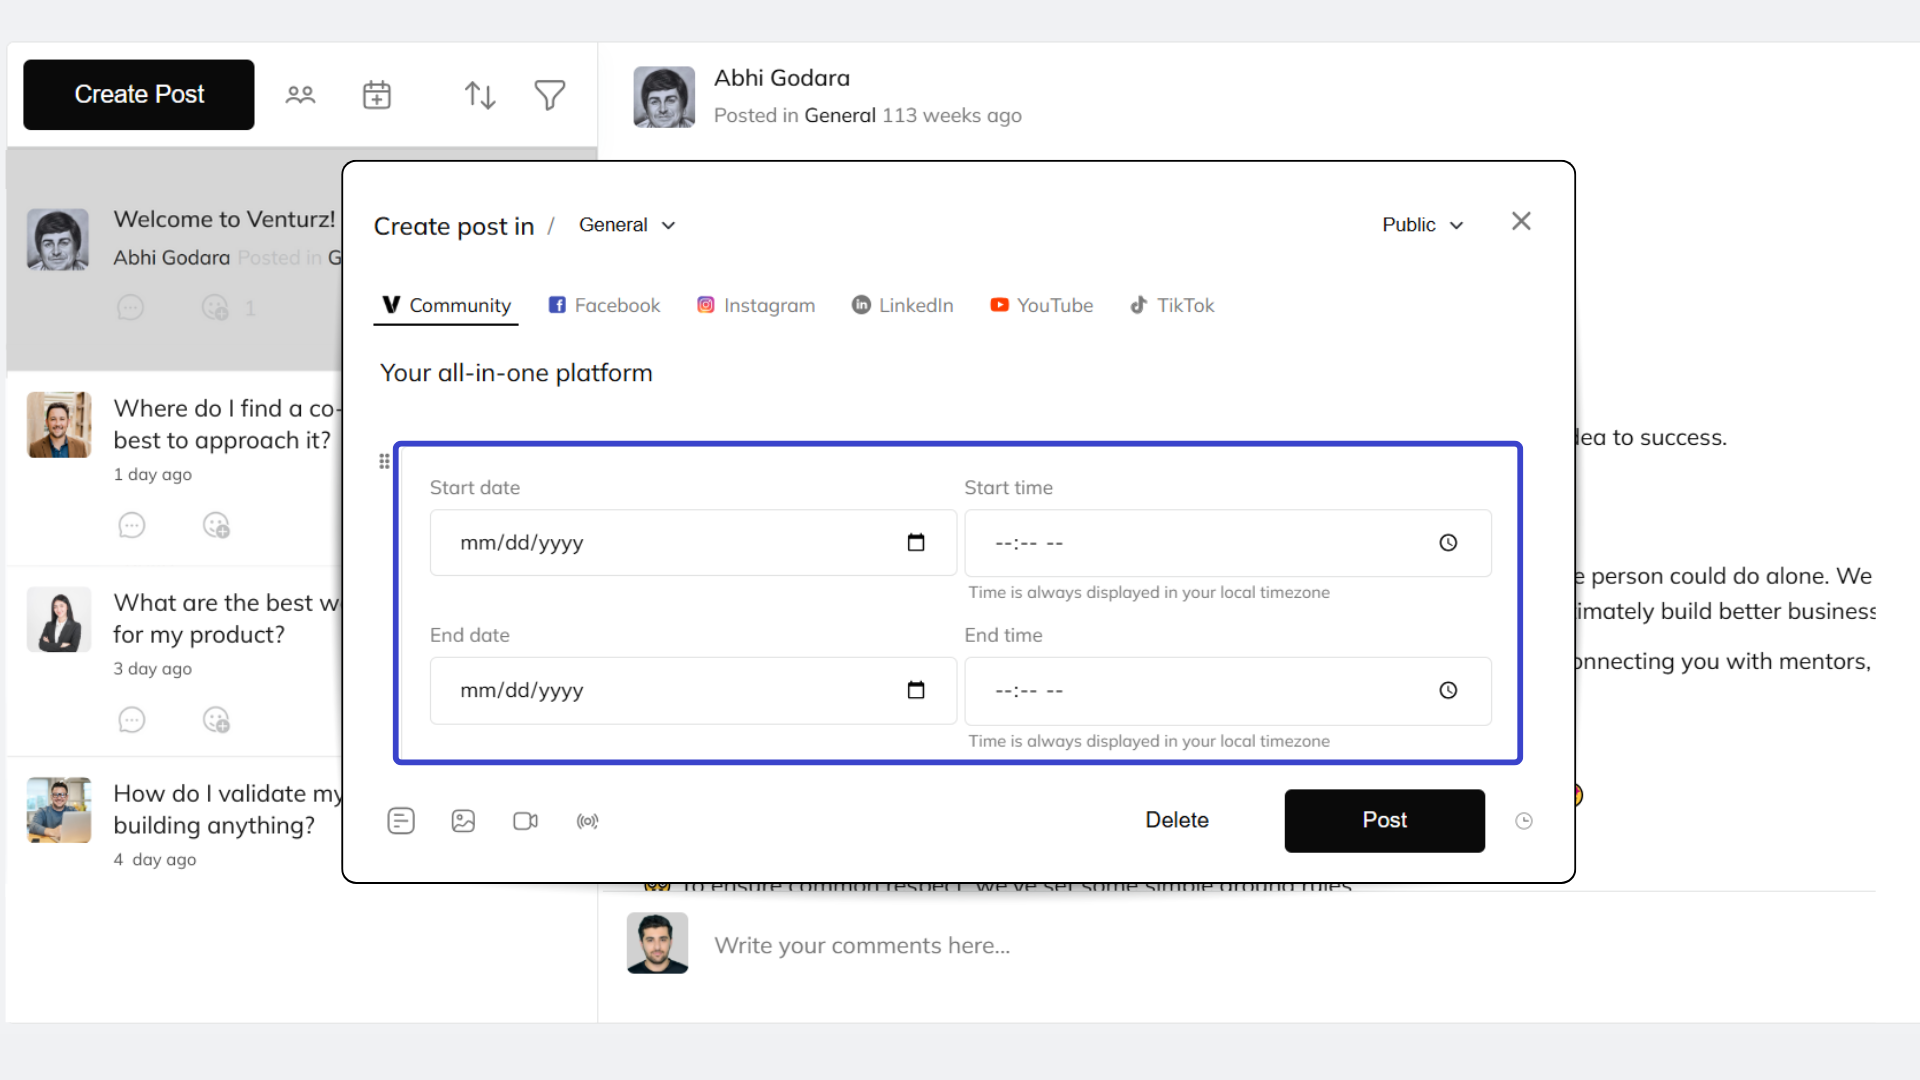
To share an upcoming event, click on the Create Event icon. You’ll be able to choose the date, time, and how often it should occur. For the location, you can select to host it within the community or link to a third-party platform like Zoom or YouTube.
You can also set a reminder notification for your audience—choose whether to notify them 1 hour, 1 day, or 1 week before the event starts.
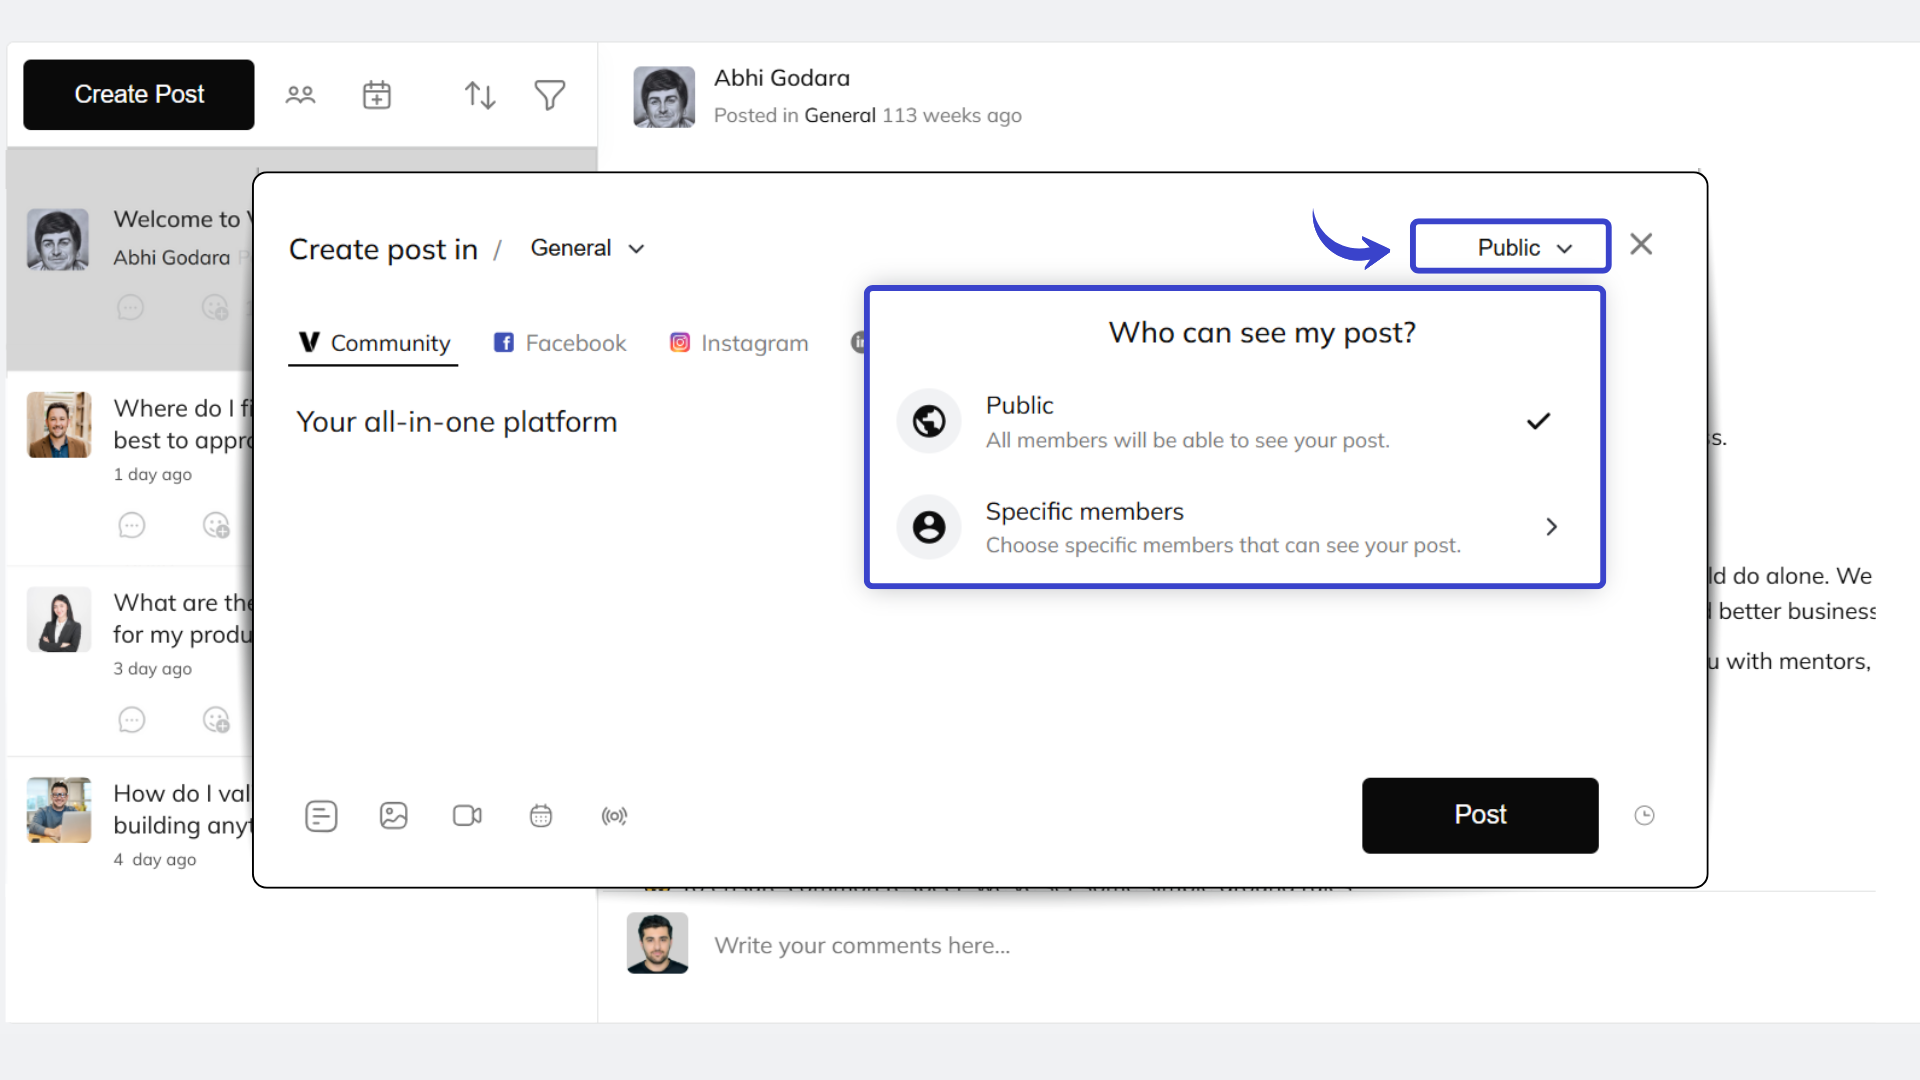
Each time you publish a post, you can choose its visibility:
- Public – Visible to everyone
- Restricted – Only selected members can view the post. This is useful for paid subscribers or exclusive content
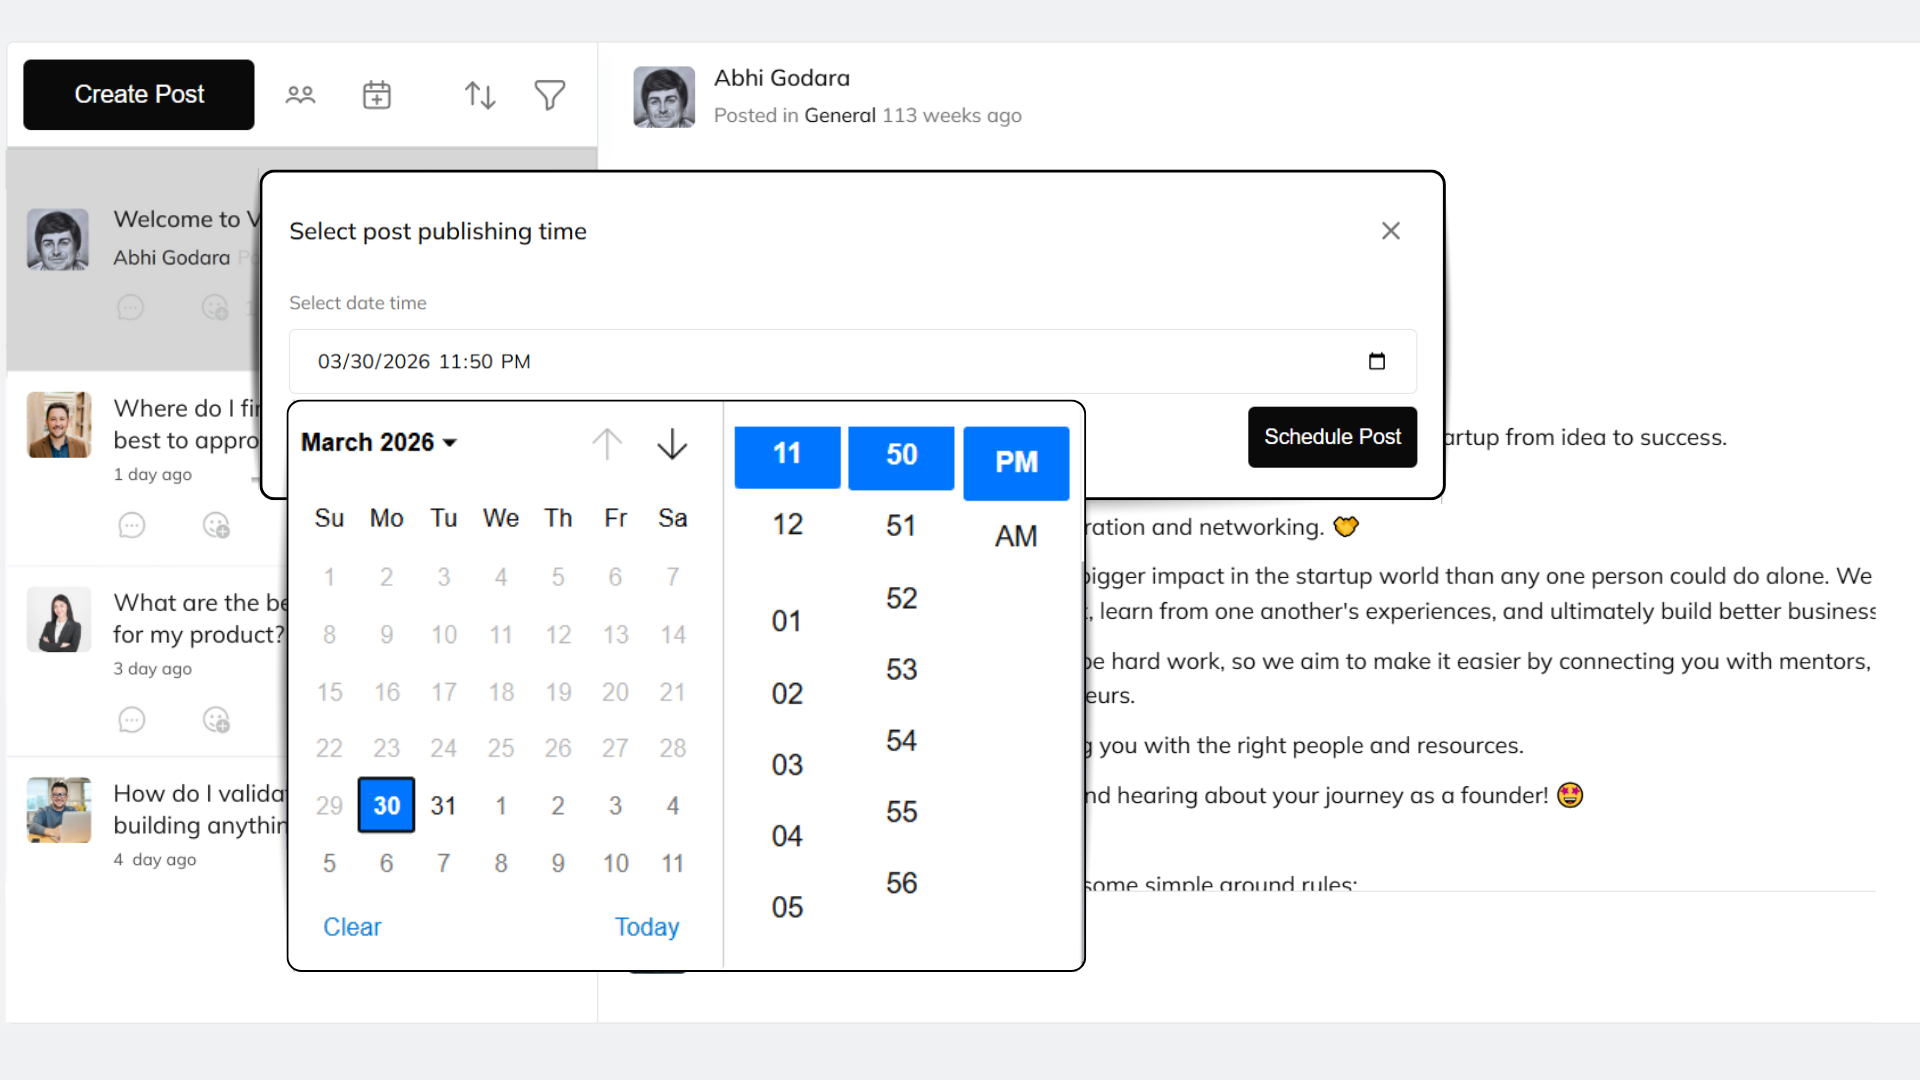
You don’t have to post right away.
You can schedule your community post to go live at a later time—perfect for planning ahead or aligning with events.
Venturz makes it easy to create, schedule, and manage social media content—all from one place. You can post on Facebook, Instagram, LinkedIn, X (Twitter), YouTube, and TikTok without switching between platforms.
To get started:
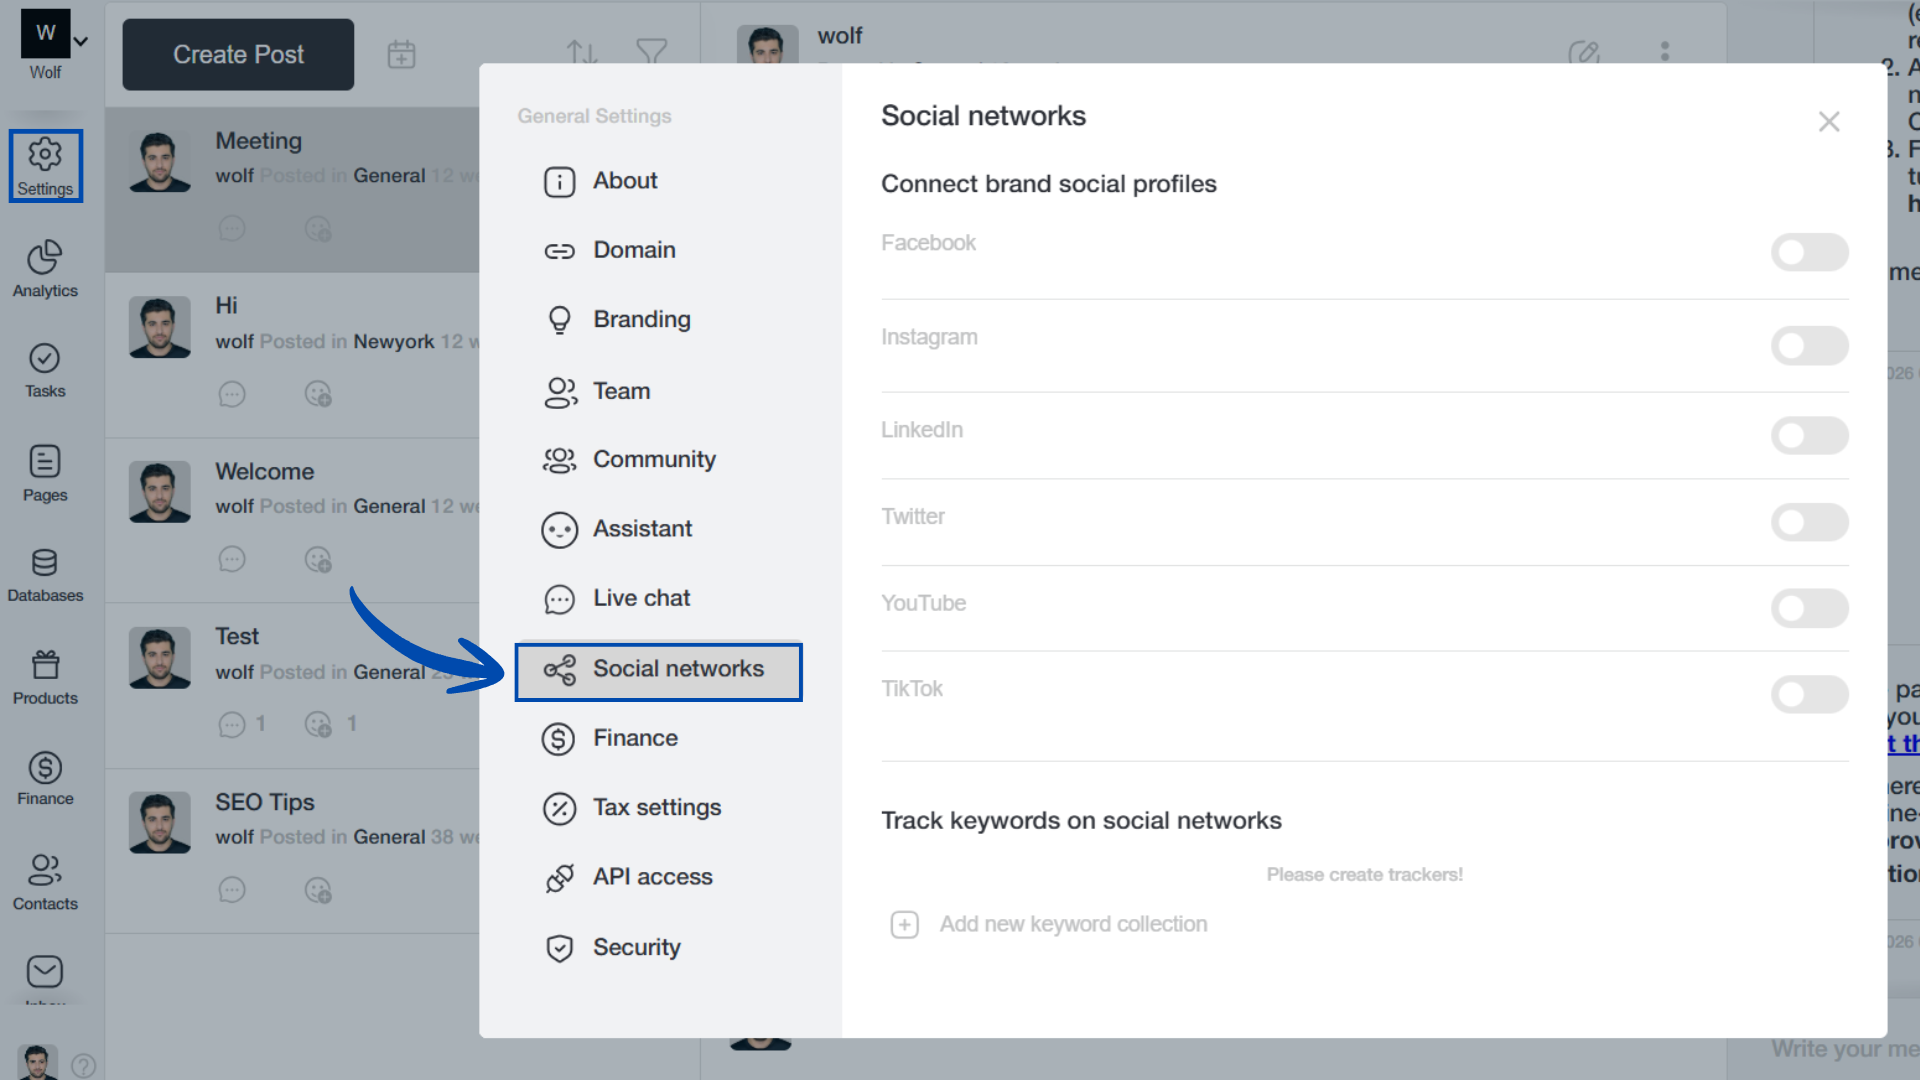
- Go to Settings → Social Networks
- Click to enable the platform you want to connect
- A new window will open asking you to log in and authorize the connection
Once connected:
- The icon will turn green (connected)
- If it's grey, that means the platform hasn't been authenticated yet
Make sure all platforms you want to post on are connected before creating a post.

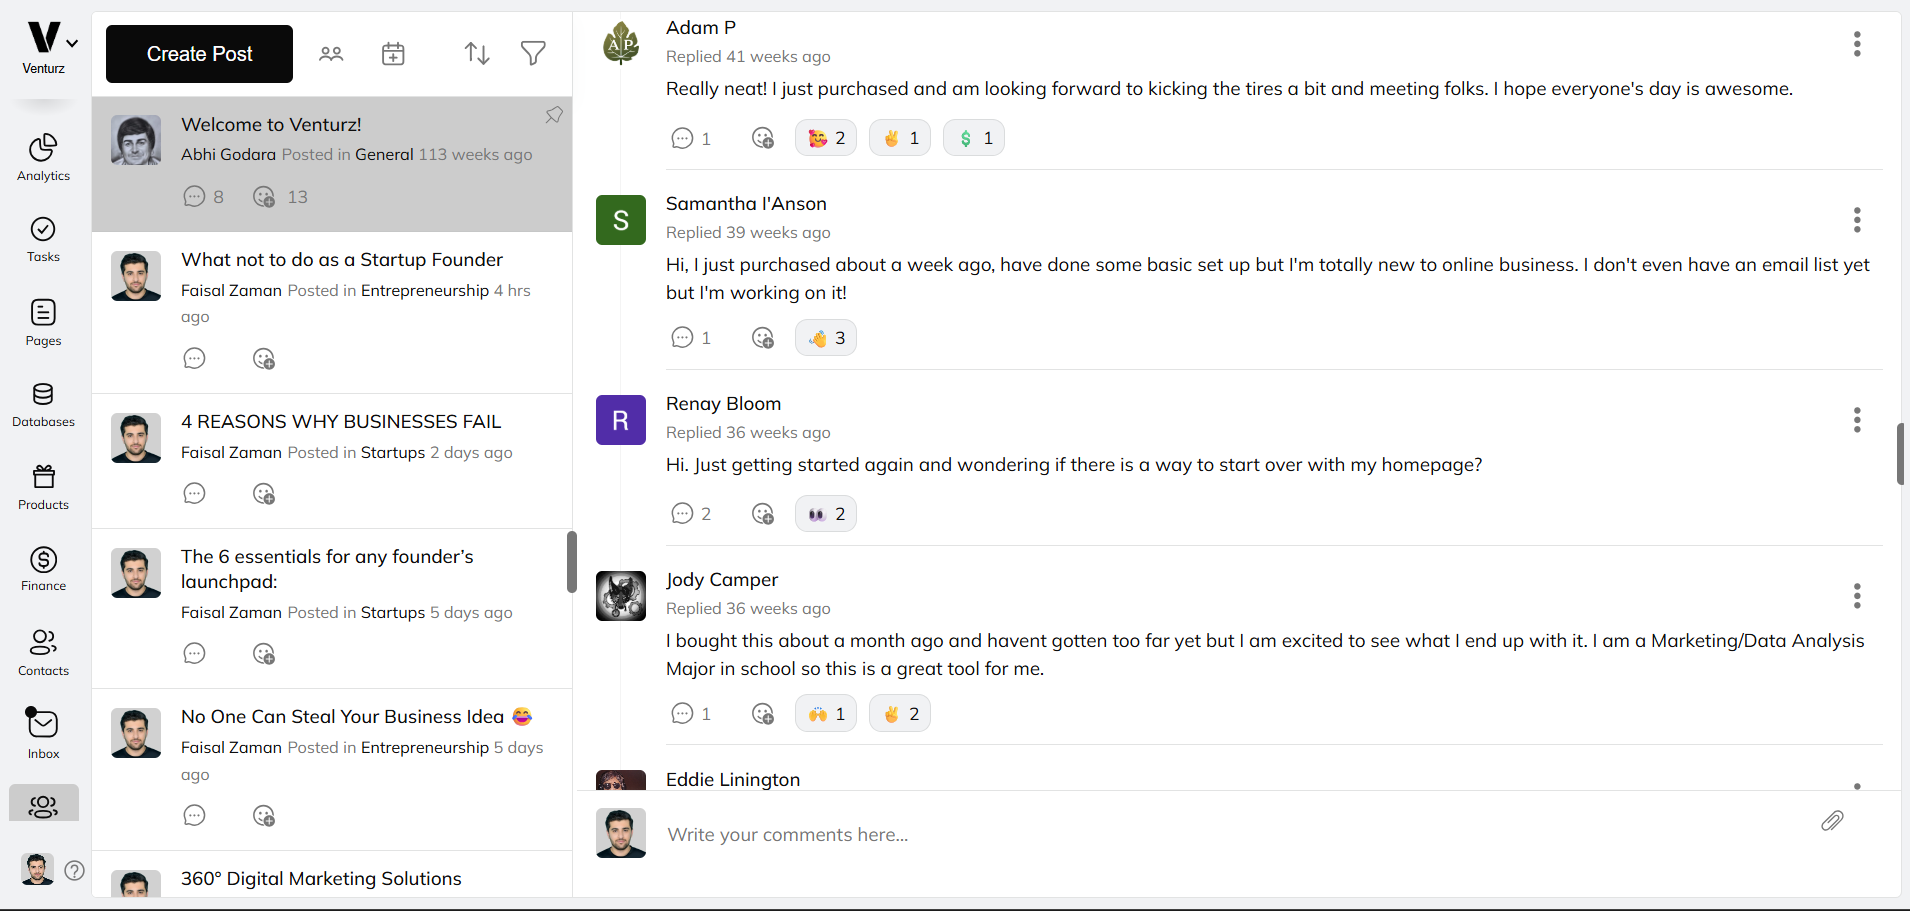
To create a post:
- Go to the Community section in your dashboard
- At the top of the page, you'll see all the supported social media platforms
Select the platform(s) where you want your post to appear. You can post to a single platform or post in multiple platforms at once. Start writing your post directly in the editor.
You can also type “/” to add content blocks like:
- Text
- Images
- Videos
- Links
- Buttons
This helps you create rich, engaging posts that are customized for each channel.

After writing your post:
- Click on the Schedule icon next to choose the date and time for publishing
- You can manage your scheduled posts using the calendar view
To edit a scheduled post:
- Open the calendar
- Click on the post you want to change
- Make your edits and re-save the post
This gives you full control to plan and manage your social media content ahead of time.
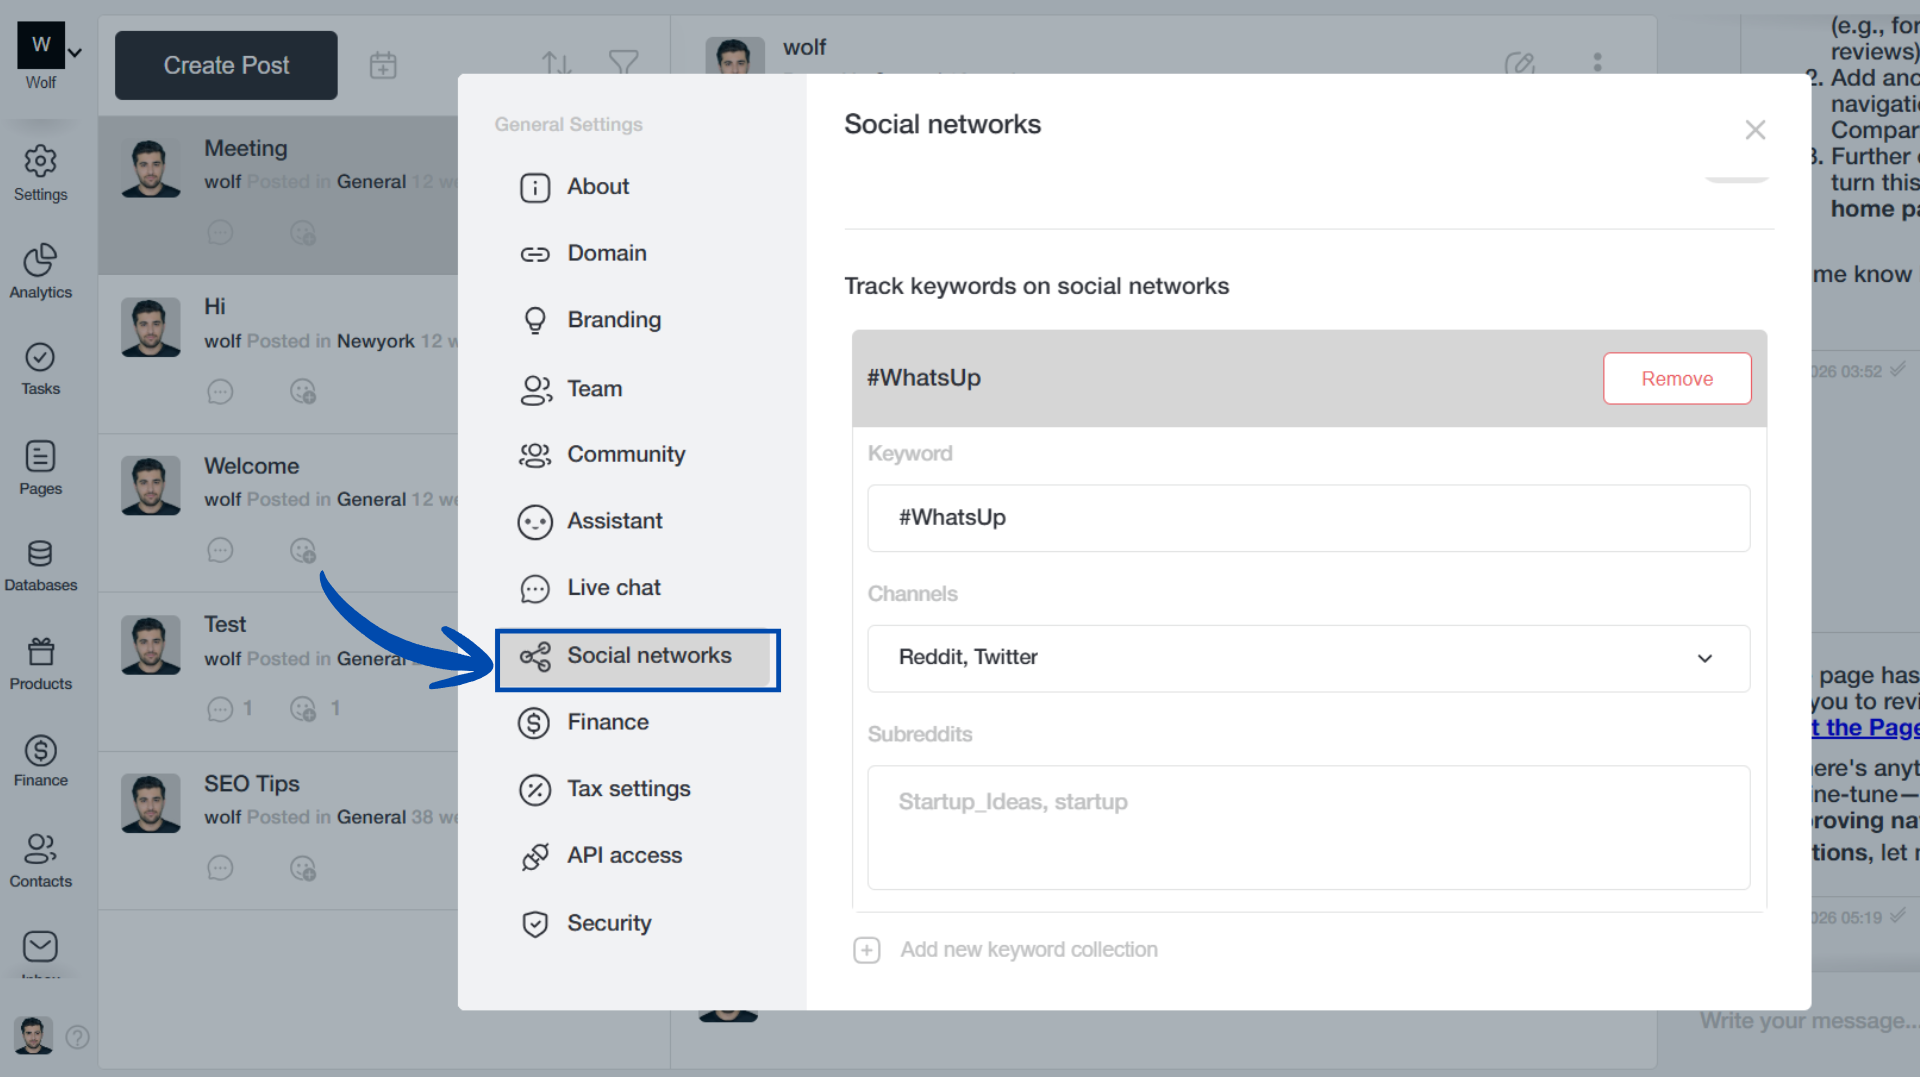
- Go to Settings in your dashboard, select Social Networks, and under Social Networks, you will see the option to Track Keywords on Social Networks.
- Enter the keywords, brand names, or hashtags you want to monitor.
- Choose where you want to track mentions (Twitter, Reddit, forums, blogs, etc.). You can select multiple platforms for a broader reach.
- You will receive email notifications directly in your inbox whenever a mention occurs.
- You will see all the collected data in your database for analysis and insights.
Only community members who are logged in can participate and engage in discussions. Posting, commenting, and reacting will be enabled for them.
Visitors or logged-out users can only view posts that are set to public.

Once you’ve created a community, your users can access their dedicated customer portal through a direct link: https://{yourdomain}.com/community.
This portal allows them to sign up, manage their profile, view purchases, control notifications, and access referral options—all in one place.
At the bottom-left corner of the community page, visitors will find Login/Sign Up button. They can create an account using one of the following methods:
- Google
- Facebook
- LinkedIn
- Twitter
- Or their email address.
Once they’re logged in, they land into your community.

The customer portal includes multiple tabs to help users manage their experience:
1. Profile
Under profile settings, users can upload their profile image, update their name and email address, and write or edit their biography.

2. Notifications
This section lets users manage what community alerts they receive. They can individually toggle notifications for:
- Comments
- Replies
- Reactions
- Mentions
There’s also an option to enable or disable all notifications at once.

View Products & Subscriptions
In the Billing tab of the customer portal, users will see all the products or services you’ve made available—whether one-time purchases or subscription-based. This includes things like paid courses, community memberships, digital products, or event passes. They can quickly check what they’ve subscribed to or purchased from your venture.

Manage Subscriptions (Stripe)
For active subscriptions, users can click the Manage button next to a product. This opens a secure Stripe-hosted portal where they can update payment methods, switch to a different plan, or cancel their subscription. It gives them full control over their billing without needing to contact support.

Refer & Earn
If you’ve enabled a referral program, users will find their personal referral link under this tab. You can set up referral programs from the Campaigns section, and they will automatically appear here for each user.

Yes, subscribers get access to their own profile under the Billing section, powered by Stripe Customer Portal. They can view/change their plan, update payment methods, download invoices, or cancel/upgrade anytime—completely self-serve.
Can't find the solution to your problem and feeling stuck?
No worries at all! We're here to help you out. You can easily reach us in two ways: either by sending an email to support@venturz.co or by clicking on the live chat 💬 button located in the right bottom corner of your screen. Don't hesitate to get in touch with any questions you might have!
Startup Events
Live Chat